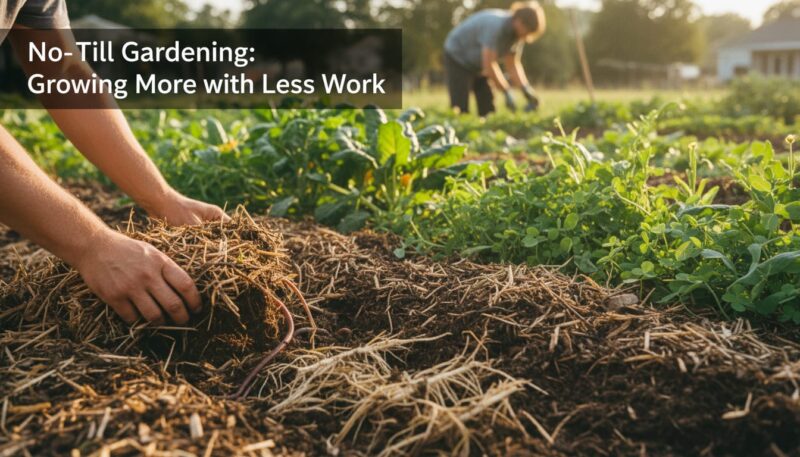
Beginners often feel overwhelmed when starting their microgreens journey.
But they shouldn’t.
Growing these tiny powerhouses of nutrition is easier than most people think.
With just basic supplies and minimal space, anyone can start producing fresh, homegrown microgreens in as little as 7-14 days.
These nutrient-dense plants not only add a burst of flavor to meals but also provide up to 40 times more vitamins than their mature counterparts.
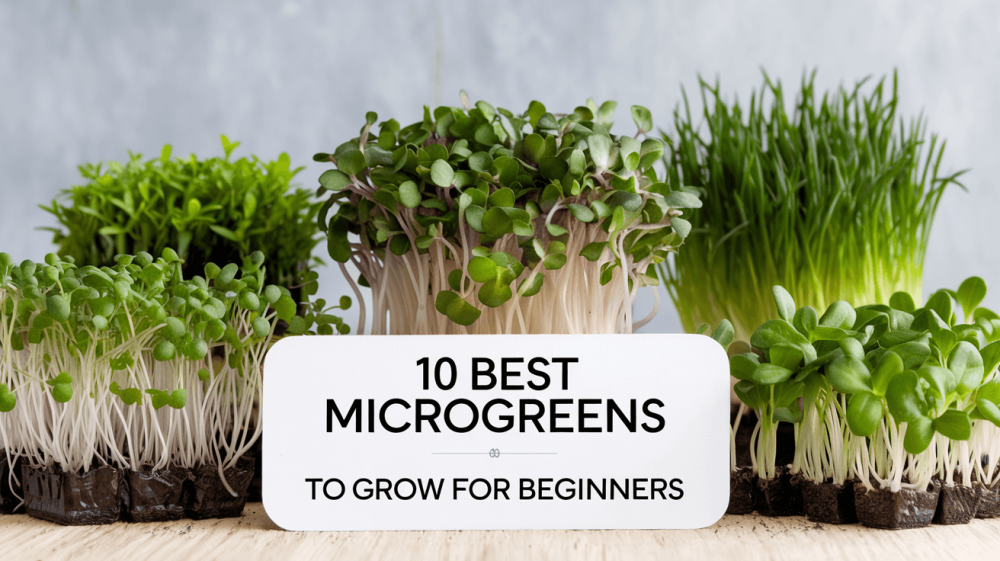
Whether they’re looking to boost their health game or start a small business, this guide will show them the top 10 most foolproof microgreens to kickstart their growing adventure.
Key Takeaways:
- Radish and Pea Shoots are top starter choices – they grow fast (5-7 days) and rarely fail.
They’re like training wheels for your microgreens journey
- Basic Equipment is all you need – just grab trays, soil, and seeds.
No fancy gear required to get started.
- Sunflower and Broccoli microgreens pack serious nutrition and are super forgiving.
They’ll grow even if you mess up a little.
- Light Requirements are simple – a sunny windowsill works great.
You don’t need expensive grow lights to start.
- Quick Results keep you motivated – most beginner-friendly microgreens are ready in 7-14 days.
You’ll see progress every single day.

Pea Shoots
Before starting a microgreens journey, pea shoots stand out as an ideal choice for beginners. They’re incredibly forgiving and offer a fantastic return on investment. These tender greens bring the essence of fresh garden peas to any dish, making them a favorite among home growers and chefs alike.
Sweet and Mild Taste
Even picky eaters love pea shoots. They deliver a delightfully sweet flavor that tastes just like fresh garden peas. These tender greens add a gentle crunch to salads and sandwiches. They’re also packed with nutrients, offering high levels of vitamins A and C.
Fast-growing Crop
To get started with pea shoots, all one needs is basic growing supplies and 7-14 days of patience. They’re one of the quickest microgreens to harvest, making them perfect for those eager to see results. Their high germination rate means fewer disappointments for new growers.
Sweet success comes easily with pea shoots because they’re naturally resistant to most common growing problems. They thrive in normal room temperature and don’t need special lighting setups. Most beginners can expect a nearly 100% success rate on their first try, making these microgreens a confidence-building first crop.
Radish Microgreens
You’ll find radish microgreens at the top of every beginner’s growing list. These tiny powerhouses pack a mighty flavor punch and are incredibly forgiving for new growers. They thrive in most conditions and don’t need special attention to flourish.
Spicy Kick Flavor
Little bursts of peppery goodness make radish microgreens a favorite in the kitchen. They bring a zesty kick to sandwiches, salads, and soups. Their taste is milder than mature radishes but still delivers that signature spicy bite that chefs love.
Ready in 7 Days
Even beginners can’t go wrong with these quick growers. They sprint from seed to harvest in just 7 days, making them perfect for impatient gardeners. They show results fast, which helps keep motivation high.
Radish microgreens are one of the fastest-growing varieties available. They germinate in 24 hours and reach perfect harvesting height in a week. Their speed makes them ideal for continuous harvesting – when one batch is done, another can be right behind it.
Sunflower Microgreens
Now, sunflower microgreens stand out as one of the most rewarding choices for beginners. They grow quickly, usually ready for harvest in 7-10 days, and offer an impressive yield. These mighty greens pack a nutritional punch with high levels of protein and necessary minerals.
Nutty and Crunchy Texture
Sunflower microgreens deliver a delightful nutty flavor that kids and adults both love. They add a satisfying crunch to sandwiches, salads, and smoothies. Their meaty texture makes them a perfect protein substitute for vegetarian dishes.
High Germination Rate
You’ll find that sunflower seeds have an excellent germination success rate of up to 90%. This means less waste and more greens for your money. They’re forgiving with watering schedules and grow well in various temperatures.
Plus, these microgreens don’t require special equipment or fancy setups. A simple tray, good soil, and basic lighting will do the trick. Warning: remove seed hulls before eating to avoid any choking hazards. Their resilient nature makes them perfect for first-time growers who might make a few mistakes along the way.
Broccoli Microgreens
All beginners love broccoli microgreens for their fast growth and high success rate. They’re ready to harvest in just 7-10 days, making them a perfect starter crop. These tiny powerhouses grow well in most conditions and don’t need much attention. They’re perfect for indoor growing year-round.
Mild cabbage-like taste
Now gardeners can enjoy the delicate flavor that’s milder than mature broccoli. The taste is perfect for salads and sandwiches. They add a gentle, nutty kick without overpowering other ingredients. Even picky eaters often enjoy these tender greens.
Nutrient-dense crop
There’s a reason why health enthusiasts love broccoli microgreens. They pack up to 40 times more nutrients than mature broccoli plants. These little greens are loaded with vitamins A, C, K, and calcium.
Broccoli microgreens contain high levels of sulforaphane, a compound that supports immune health. They’re also rich in antioxidants that help fight inflammation. Gardeners can add them to smoothies, soups, or eat them straight from the growing tray. Just avoid eating any yellowed or wilted leaves.
Arugula Microgreens
To start a microgreens journey, arugula stands out as a perfect beginner-friendly option. These tiny powerhouses grow quickly, usually ready for harvest in 7-10 days. They offer a delightful combination of flavor and ease of growth, making them an excellent choice for anyone starting their microgreens adventure.
Peppery and Fresh Flavor
Any food enthusiast will appreciate arugula microgreens’ distinctive peppery kick. They pack more flavor punch than their mature counterparts. These little greens can transform ordinary salads, sandwiches, and garnishes into gourmet experiences. Their taste profile makes them a favorite among home cooks and professional chefs alike.
Easy to Maintain
Clearly, arugula microgreens are among the most low-maintenance options available. They thrive in normal room temperature and require basic indirect sunlight. Unlike other varieties, they’re resistant to common growing problems and don’t need special equipment or complex care routines.
Microgreens like arugula need minimal attention to flourish. They require just a light misting of water once or twice daily, and growers can expect consistent results with basic care. Their high germination rate means better value for money, and their quick growth cycle allows for frequent harvests. Even if someone makes a few mistakes, these resilient plants often bounce back.

Mustard Microgreens
Despite their tiny size, mustard microgreens pack a powerful punch of flavor and nutrition. These vibrant greens are perfect for beginners because they’re incredibly forgiving and adaptable to various growing conditions. They require minimal setup and maintenance, making them an excellent choice for anyone starting their microgreens journey.
Spicy and Tangy Taste
Tangy and zesty, mustard microgreens bring explosive flavor to any dish. They offer a perfect balance of peppery heat and fresh greens taste. Their bold flavor profile makes them a favorite among chefs and home cooks. These little powerhouses can transform ordinary salads, sandwiches, and garnishes into gourmet experiences.
Quick Harvest Time
Harvest time for mustard microgreens is remarkably fast, making them ideal for impatient gardeners. They typically reach harvest readiness in just 7-10 days after planting. This quick turnaround allows growers to maintain a constant supply with minimal effort. Their speedy growth cycle means less time waiting and more time enjoying.
A consistent growing schedule can yield fresh batches every week. Growers should watch for the development of their first true leaves, which signals peak harvest time. The plants will be about 1-2 inches tall when ready, showing vibrant green leaves with their characteristic mustard flavor at its strongest. Regular harvesting encourages continuous production throughout the growing season.

Kale Microgreens
Unlike many other microgreens, kale microgreens offer a perfect balance of nutrition and ease of growth. These tiny powerhouses pack more nutrients than their full-grown counterparts. They bring a vibrant green color to any dish and can be harvested in just 8-12 days.
Mild and Fresh Flavor
You’ll discover that kale microgreens have a milder, more delicate taste compared to mature kale leaves. Their subtle nutty flavor makes them perfect for salads, smoothies, and sandwiches. Even people who don’t enjoy regular kale often love these tender microgreens.
Beginner-friendly Crop
An ideal choice for first-time growers, kale microgreens are highly forgiving and resilient. They germinate quickly and grow uniformly, making them perfect for beginners who are just learning the basics of microgreen cultivation.
You can start growing kale microgreens with basic supplies – just a tray, soil, and seeds. They don’t need fancy equipment or special growing conditions. These hardy plants tolerate temperature fluctuations well and rarely face pest problems. Most beginners see success in their very first attempt.
Basil Microgreens
Your journey into microgreens gardening can start with basil – a beginner-friendly herb that delivers amazing results. These tiny powerhouses pack more flavor than their full-grown counterparts. They’re ready to harvest in just 10-14 days, making them a quick and rewarding choice for new growers.
Sweet aromatic taste
Assuming someone wants to add a punch of flavor to their dishes, basil microgreens are the perfect choice. They offer a sweet, peppery kick that’s more intense than mature basil leaves. They can transform ordinary salads, soups, and pizzas into gourmet experiences. Plus, they’re loaded with antioxidants and vitamins.
Simple growing process
Even complete beginners can grow basil microgreens successfully. They need basic supplies: a tray, soil, seeds, and some water. The seeds don’t require pre-soaking, and they germinate reliably in warm conditions. They prefer temperatures between 65-75°F and moderate light.
To start growing, one should spread seeds evenly on moist soil, cover them lightly, and keep them in a dark place until germination. After sprouting, they need good air circulation and moderate light. Water them gently from the bottom to avoid damaging the delicate seedlings. Avoid overwatering as this can lead to mold growth.
Cress Microgreens
For anyone starting their microgreens journey, cress is a perfect choice. These tiny powerhouses are incredibly forgiving and easy to grow. They don’t require soil and can thrive on just paper towels. Cress microgreens offer a delightful mix of nutrients and flavor that can transform any dish from ordinary to extraordinary.
Peppery Fresh Flavor
Peppery notes burst through with every bite of cress microgreens. They add a zesty kick to sandwiches, salads, and soups. The flavor is milder than mature cress, making them perfect for those new to spicy greens. Even picky eaters often enjoy their gentle heat and fresh taste.
Very Quick Growth
You can harvest cress microgreens in just 5-7 days. They’re one of the fastest-growing microgreens available. This rapid growth cycle makes them ideal for impatient gardeners who want quick results. They sprout reliably and grow uniformly, giving a satisfying harvest every time.
This quick turnaround means growers can have fresh microgreens year-round. They can start a new batch every few days for continuous harvests. The speed also means less time for things to go wrong, making them perfect for beginners. Even if someone makes mistakes, they can start over quickly without losing much time.
Cilantro Microgreens
Cilantro microgreens are a fantastic choice for beginners due to their resilience and quick growth cycle. They typically reach harvest readiness in 10-14 days, offering a satisfyingly fast turnaround for those eager to see results .
These tiny greens pack a powerful punch of flavor and offer a range of health benefits, and are very popular among microgreens growers making them a rewarding addition to any microgreens garden.
Flavor Profile
Cilantro microgreens boast a bold and refreshing flavor, often described as citrusy and slightly peppery with herbal undertones . This vibrant taste mirrors the unique essence of mature cilantro leaves but with an added intensity that can elevate a variety of dishes .
Growing Process
Even those new to gardening can successfully cultivate cilantro microgreens. They require minimal equipment and thrive in simple setups with basic care . Here’s a quick guide to get started:
- Soaking (optional): While not essential, soaking the seeds for 12-24 hours may speed up germination .
- Planting: Sow seeds evenly on a moist growing medium, ensuring they are close but not overlapping .
- Covering: Use a second tray or a cover to block out light during germination, maintaining a temperature of around 70°F (21°C) .
- Growing: Once germinated, remove the cover and provide moderate light. Water from the bottom to prevent mold growth .
- Harvesting: Harvest when the first true leaves appear, typically around 10-20 days after planting .
Health Benefits
Cilantro microgreens are a nutritional powerhouse, offering a concentrated source of vitamins and antioxidants. They are particularly rich in:
- Vitamin K: Essential for blood clotting and bone health .
- Vitamin C: A powerful antioxidant that supports immune function and collagen synthesis .
- Carotenoids: Including beta-carotene, lutein, and zeaxanthin, which promote eye health and protect cells from damage .
Culinary Uses
Cilantro microgreens add a burst of flavor to a wide range of dishes. Their versatility makes them a favorite among chefs and home cooks alike. Some popular uses include:
- Garnishing soups and curries: Enhancing aroma and adding a fresh herbal note .
- Adding to salads and salsas: Providing a zesty kick and visual appeal .
- Incorporating into sandwiches and wraps: Introducing a lively and aromatic element .
- Elevating Mexican, Indian, and Asian cuisine: Complementing the flavors of various dishes .
With their ease of growth, vibrant flavor, and impressive nutritional profile, cilantro microgreens are a rewarding and delicious addition to any microgreens garden.
Final Words
Hence, anyone can start their microgreen journey with these beginner-friendly options. They’ll find success with radish, pea shoots, and sunflower microgreens right from the start. These varieties grow fast and rarely fail. Plus, they pack amazing flavors that make every meal pop. A newbie grower can harvest their first batch in just 7-10 days. That’s quick wins and instant gratification. When they master these basics, they can level up to more exciting varieties. The best part? They’ll save money and enjoy fresher, tastier food at home.
FAQ
Q: What are the easiest microgreens to start with?
A: Start with radish, pea shoots, and sunflower microgreens.
They grow fast (7-10 days).
They’re super hard to mess up.
Plus, they taste amazing and look beautiful on your plate.
Trust me, these are your new best friends in the microgreens game.
Q: How much light do microgreens need?
A: You need about 4-6 hours of direct sunlight.
A sunny windowsill works great.
Don’t have good natural light? No problem.
A basic LED grow light will do the trick.
Keep the light 6 inches above your plants.
That’s all you need to succeed.
Q: What supplies do I need to start growing microgreens?
A: Here’s your simple starter kit:
1. Shallow trays with drainage holes
2. Good quality potting soil
3. Seeds (radish, pea, or sunflower)
4. Spray bottle
5. Scissors
That’s it. Don’t overcomplicate it.
Q: How often should I water my microgreens?
A: Water twice a day with a gentle mist.
Morning and evening works best.
Keep the soil moist but not soaking wet.
If the soil feels dry to touch, give it a spray.
Simple as that.
Q: When can I harvest my first batch of microgreens?
A: Most microgreens are ready in 7-14 days.
Look for the first true leaves.
They should be about 2-3 inches tall.
Cut just above the soil line.
Boom – you’ve got fresh microgreens.
Q: Why are my microgreens falling over?
A: Three main reasons:
1. Too much water
2. Not enough light
3. Too many seeds in one spot
Give them space to breathe.
Less water, more light, and proper spacing fixes this 90% of the time.
Q: Can I reuse the soil after harvesting?
A: No. Don’t reuse the soil.
Fresh soil = healthy plants.
Old soil can carry diseases.
It’s cheap insurance for your next crop.
Start fresh each time and you’ll thank me later.