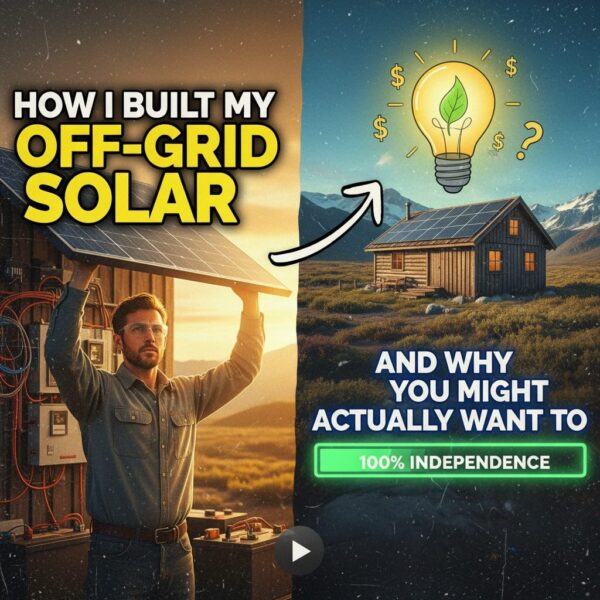

Installing solar panels converts sunlight into electricity. This process helps homeowners reduce dependence on the grid.
Begin by assessing your home’s solar suitability.
Check the roof condition, sunlight exposure, and shading.
This step maximizes the energy potential of the solar system. Next, perform an energy audit to calculate your energy needs.
After determining the necessary system size, choose between professional installers or DIY kits.
Always obtain installation permits before starting. The permitting process can take 1 to 3 months, from planning to system activation.
Optimize the panels’ orientation and tilt.
Aim for an angle between 18 to 36 degrees for maximum efficiency.
Click here to learn more about: how to make homemade soap at home
Choosing The Right Solar Energy System
Choosing the right solar energy system is essential for meeting your energy needs.
An accurate home energy assessment helps determine required capacity.
Consider local climate conditions; they significantly affect system efficiency.
Key Features to Look For
- High-quality solar panels for better power generation.
- Durable inverters that withstand local weather.
“Comparing warranties ensures long-term reliability. ”
Quality warranties typically cover 25 years for both solar panels and inverters. This coverage provides peace of mind about your investment. Always prioritize reputable manufacturers to enhance system performance and longevity.
To summarize, follow these steps for effective installation:
- Assess home’s solar suitability.
- Calculate energy needs for proper sizing.
- Choose between DIY or professional assistance.
- Obtain necessary permits and approvals.
- Order solar panels, inverters, and mounts.
- Prepare installation area safely.
- Mount panels at optimal angles.
- Complete wiring, preferably by a licensed electrician.
- Install the inverter and connect to the grid or battery backup.
- Inspect the system and activate it.
Evaluating your electric bill helps in effective consumption analysis. Always comply with local codes for smooth approvals. Proper installation ensures safety and enhances your system’s longevity.

What Is A Home Energy Assessment
A home energy assessment evaluates your home’s energy use. This energy audit identifies areas for efficiency upgrades, helping you save on utility costs.
Common findings include insulation problems, air leaks, and inefficient appliances.
For homeowners considering solar system design, an assessment provides insights into the home’s solar energy potential.
To prepare for an assessment visit, gather your utility bills from the past year and note any previous efficiency upgrades.
Energy-efficient homes reduce costs and can also increase property value. This assessment is a smart choice for homeowners.
Understanding Photovoltaic Installation Basics
Photovoltaic installation converts sunlight into electricity, reducing dependence on the grid and cutting utility costs.
The process involves careful planning, obtaining necessary permits, and deciding between professional or DIY installation.
Here are some installation steps to follow:
- Assess the home’s solar suitability (roof condition, sunlight exposure, shading).
- Calculate energy needs to determine system size.
- Choose between DIY or professional installation.
- Obtain required permits and approvals.
- Order solar panels, inverters, and mounting equipment.
- Prepare the roof or ground (install racking system/rails).
- Mount panels, tilt optimally (typically 18–36 degrees).
- Complete electrical wiring, preferably by a licensed electrician.
- Install inverter, connect to grid or battery backup.
- Inspect system, obtain final approvals, and activate.
Common installation mistakes to avoid include incorrect panel orientation and failing to get necessary permits. Proper installation maximizes energy output and ensures system safety.
For further learning about installation, consider these resources:
- Online guides for DIY solar panel setup.
- Local workshops on sustainable energy systems.
Proper orientation and tilt of panels are crucial for optimal performance.
Evaluating your roof condition and energy needs will guide your installation decisions. The right components and careful installation help achieve optimal performance and long-term savings.
Home Energy Assessments and Photovoltaic Installations
- Homes with energy-efficient upgrades can save up to 30% on utility bills.
- Photovoltaic systems can reduce electricity costs by 50% or more, depending on system size and energy needs.
- Proper installation of solar panels can increase their efficiency by up to 25%.
- Homeowners can increase property value by an average of 4% with solar energy systems.
How To Design Your Solar System
Designing a solar system requires attention to energy efficiency and home aesthetics. Assessing your energy consumption is the first step.
This includes calculating total usage to determine the optimal solar system size.
Balancing aesthetics with functionality is also key.
Choose panel placements that align with your home’s design. Consider roof orientation and type for maximum sunlight exposure.
Your checklist should include:
- Evaluate Roof Suitability: Ensure no shading issues exist.
- Select Panel Type: Decide between monocrystalline or polycrystalline options.
- Consider Local Climate: Understand average sunlight hours.
- Understand Local Regulations: Know necessary permits and homeowner association rules.
Solar panel installation at home converts sunlight into electricity, reducing dependence on the grid and cutting utility costs. The process involves careful planning, permits, professional or DIY skills, and proper equipment. This ensures maximized energy efficiency and system safety.
Installation Steps Overview
- Assess your home’s solar suitability (roof condition, sunlight exposure, shading).
- Calculate energy needs to determine system size.
- Choose between DIY or professional installation.
- Obtain required permits and approvals.
- Order solar panels, inverters, and mounting equipment.
- Prepare the roof or ground (install racking system/rails, ensure safety).
- Mount panels, tilting optimally (typically 18–36 degrees for maximum output).
- Complete electrical wiring (preferably by a licensed electrician).
- Install inverter and connect to grid or battery backup if included.
- Inspect system, obtain final approvals, and activate.
Steps For Safe Inverter Installation
Installing the inverter maintains your solar setup’s functionality and safety. Know local safety codes to ensure compliance. Always use proper safety equipment, such as insulated tools and protective gear, during the installation. Common pitfalls during inverter setup include incorrect sizing and poor wiring practices. Avoid these by following manufacturer guidelines. Best practices for ongoing inverter maintenance involve:
- Regular Inspections: Look for wear and tear.
- Keep Clean: Ensure vents are free from debris.
- Document Performance: Track output to spot potential problems.
Safety is paramount; set up scaffolding and use proper mounting hardware to prevent roof leaks or hazards. Solar system activation may require local authority and utility inspections before approval for grid interconnection. Maintaining compliance with local codes and safety regulations throughout the installation process ensures smooth approvals and lasting results.
Solar System Design and Installation
- Residential solar systems can reduce electricity bills by up to 70%.
- Proper orientation and tilt of solar panels can increase energy production by 20-30%.
- Installing a solar system can increase home value by an average of 1% according to various studies.
- Regular maintenance can extend the lifespan of solar inverters and panels, ensuring optimal performance for 25 years or more.
Exploring Net Metering Benefits For Homeowners
Net metering plays a significant role in solar energy savings for homeowners. This system allows homeowners to receive credits for extra energy produced by their photovoltaic installations.
When homeowners send this excess energy back to the grid, their electricity bills can decrease significantly.
For example, families in California report annual savings of up to $1,500 because of favorable net metering policies.
Net metering policies differ across the United States. Homeowners in states with fewer incentives may not enjoy these financial benefits.
It is essential for homeowners to understand local regulations to maximize their utility bill savings. Overall, net metering provides widespread benefits for those using solar technology.
Essential Panel Maintenance Tips For Longevity
Regular maintenance is key to the longevity and efficiency of solar panels.
Homeowners should conduct periodic inspections and cleaning to enhance energy output.
Here are some essential tasks for maintaining residential systems:
- Regular Cleaning: Clean solar panels to prevent dirt buildup, which can lower power output.
- Inspect Electrical Wiring: Check wiring and connections to catch issues early.
- Seasonal Maintenance:
- Winter: Remove snow from panels.
- Fall: Clear leaves and debris.
Consulting a professional installer is advisable if panels underperform. Following these maintenance tips can greatly improve system longevity and efficiency. Ultimately, proper panel upkeep leads to more utility bill savings and better energy performance.
Net Metering and Solar Panel Maintenance
- Homeowners can save up to $1,500 annually in states with favorable net metering policies.
- Regular cleaning of solar panels can improve power output by preventing dirt buildup.
- Periodic inspections of electrical wiring can help catch issues early, ensuring system efficiency.
- Seasonal maintenance tasks, such as removing snow in winter and clearing debris in fall, are essential for optimal performance.
Financing Options For Solar Panel Setup
Choosing the right financing options is essential for homeowners interested in solar energy. Various financing solutions can help lower the upfront costs associated with solar panel setup.
Homeowners can opt for cash purchases, solar loans, leasing, or Power Purchase Agreements (PPAs).
These methods affect long-term savings and system performance.
Types of Financing Available
Solar loans typically offer low-interest rates and flexible terms.
This can enable you to choose a larger solar panel system. Leasing allows homeowners to pay a monthly fee for using solar panels without purchasing them outright.
Power Purchase Agreements (PPAs) let you pay for the power generated by the system, usually at a lower rate than your local utility’s rate.
Evaluating Financing Offers
When examining financing options, consider comparing interest rates. Look for any hidden fees that might impact your costs.
Calculate the total cost over time to find the best deal.
Always ensure your financial choice aligns with your energy needs and budget:
Tip: Perform a home energy assessment before sizing your system.
Impact on Overall System Choice
Financing options can influence your choice of system.
For instance, lower monthly payments may allow you to invest in higher quality components that enhance system efficiency. Always evaluate your electric bill and perform a home energy audit to determine your energy needs.
Long-Term Considerations
State and federal energy incentives, such as tax credits and rebates, can significantly lower upfront costs.
The installation timeline from contract signing to system activation typically takes 1 to 3 months, with the physical installation lasting 1 to 3 days. Choosing high-quality components and trusted installers is crucial for safety and long-term savings.
By understanding financing options, you can make informed decisions that maximize the benefits of your solar panel investment.
| Financing Option | Advantages |
|---|---|
| Solar Loans | Low-interest rates and flexible terms |
| Leasing | No upfront purchase required; monthly fee |
| Power Purchase Agreements (PPAs) | Pay for power at a lower rate than utility |
| State and Federal Incentives | Tax credits and rebates to reduce upfront costs |
DIY Solar Energy System Guide Simplified
Best Solar Panel Kits For DIY Success