There’s a moment standing on your land when the wind cuts through, the sun’s dropping behind the ridge, and you realize something profound: nobody’s coming to fix this but you. That’s the moment the grid starts feeling like a luxury you can no longer afford—not in dollars, but in freedom.
I remember it clearly. We were two hours from the nearest town, listening to a diesel generator rattle all night like some angry metal beast. The fuel bills were climbing. The noise was maddening. And every time the power flickered, I thought: there has to be a better way.
There was. It just required learning how to build it myself.
Table of Contents
Why Go Off-Grid in the First Place?
Look, the reasons vary. Some folks live too far out for utility lines to reach. Others are genuinely tired of watching their power bill climb 3% annually while the grid gets less reliable. And then there are the rest of us—the stubborn ones who just want to know their power comes from the sun, stored safely, used wisely.
The math changed dramatically in the last five years. Solar panel costs dropped 60%. Lithium batteries went from “crazy expensive” to “actually reasonable.” Pre-engineered kits now handle most of the complexity. And if you’re willing to do the work yourself—not hiring an electrician for every connection—you can save 30–40% on labor.
That’s real money. Thousands of dollars. Money that could go toward expanding the system later, or toward something else entirely.
What You’re Actually Building: A Brief Reality Check
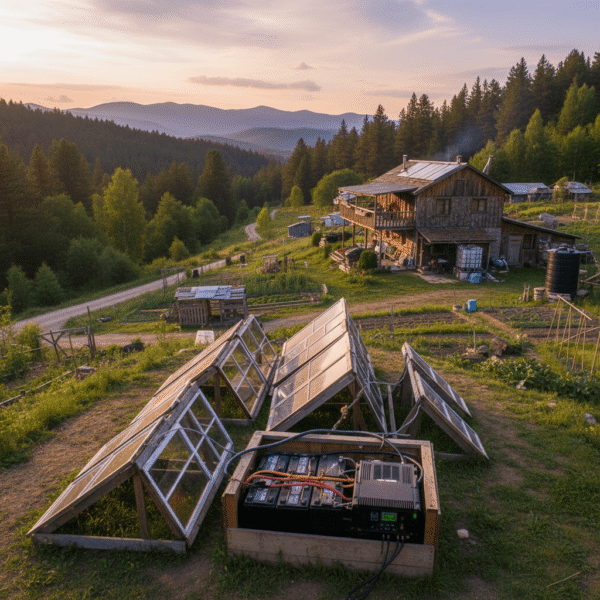
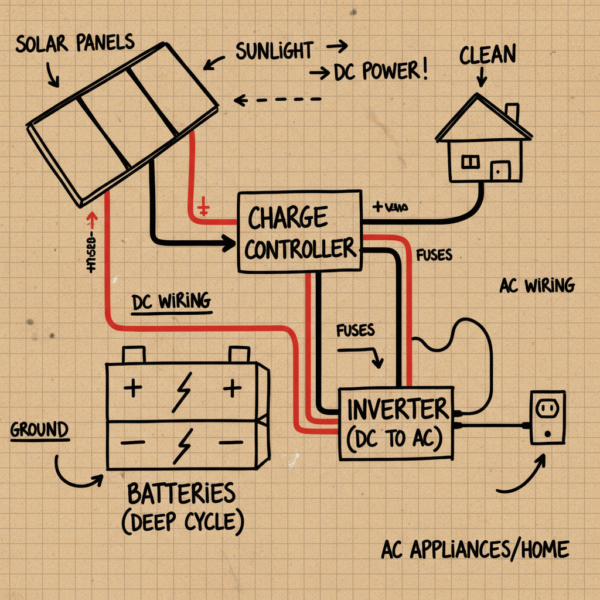
An off-grid solar system isn’t magic. It’s five interconnected pieces working together in a precise dance:
Solar panels catch light and turn it into direct current electricity. That’s the generator.
Batteries store that electricity for when the sun’s gone. That’s your savings account.
A charge controller regulates the flow so batteries don’t overcharge and explode. That’s your insurance policy.
An inverter converts stored DC power into AC electricity—the kind that runs your fridge, lights, and tools. That’s your translator.
Wiring, breakers, fuses, and disconnects keep everything from burning down. That’s your safety net, and honestly, it’s the part people skip on, and it’s where fires start.
Unlike grid-tie systems (where you sell excess power back), off-grid means you make all the power, store all of it, and live within what you’ve got. On cloudy weeks in November, you feel that constraint deeply. On sunny June days, you feel invincible.
Sizing Your System: The Part That Actually Matters (yep size does matter)
Most people rush this. They see a big solar panel and think “that’ll do it.” It won’t.
You need to know three things:
First: How much power do you actually use?
Sit down for a week. Write down every appliance, every habit. Your fridge runs 24/7—that’s roughly 150–800 watts depending on efficiency.
Your well pump? Could be 500–3,000 watts when it kicks on. Water heating, laundry, cooking, lights—it adds up fast. I tracked ours and landed at 27 kWh per day. That number becomes everything.
Second: How many hours of good sun does your location get?
This varies wildly. Arizona gets six peak sun hours daily. Maine gets four in summer, maybe two in winter. This is crucial because it determines panel quantity. If you need 27 kWh daily and get five peak sun hours, you’re looking at roughly 5.4 kW of panels.
That’s about 14 standard 400-watt panels. In winter with lower sun angles, you might need to adjust, or accept that you’ll run a backup generator during deep cold spells.
Third: How many days of backup do you want when clouds roll in?
I built for five days. My battery bank stores around 16 kWh. That sounds excessive until December when it clouds over for a week. Then that battery bank feels like the smartest decision I ever made.
Panels: Don’t Cheap Out, But Don’t Overthink It Either
I’ll be direct: I bought discount panels on my first attempt. Watched them degrade faster than expected, and dealing with warranty claims was a nightmare. Now I choose Tier-1 monocrystalline with 25-year warranties. They cost more upfront but they’re literally there for decades.
200 Watt High-Efficiency 12V Monocrystalline Panel
These work beautifully for smaller systems or phased expansion. 19.98% efficiency, which is genuine. I started with these.
350–550W Tier-1 Monocrystalline Solar Panels
For mid-to-large systems, these punch above their weight. Mix and match wattages based on your actual needs. The 25-year warranty gives real peace of mind.
MEGA 200 Briefcase – Portable Monocrystalline Panel
Foldable, portable, comes with a kickstand. Perfect if you’re camping, boondocking, or need flexibility. My RV-living friend swears by this.
The Battery Bank: Where Most People Stumble
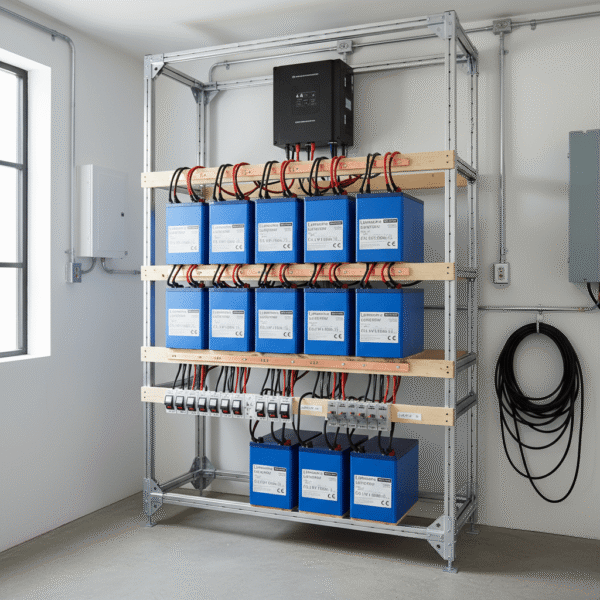
Here’s what I learned the hard way: undersized batteries are the silent killer of off-grid dreams.
You wake up on day four of cloudy weather. The battery sits at 18% charge. You’re doing laundry? Nope. Running the water heater? Nope. Even the fridge feels like a luxury. By hour eight, you’re running the backup generator because you didn’t plan deep enough.
Lithium changed everything for me. Yes, it costs more than lead-acid up front. But lithium doesn’t sulphate, doesn’t require babying, and lasts twice as long. After you’ve replaced lead-acid batteries twice, lithium suddenly looks cheap.
Battery Sizing:
Daily usage × Days of autonomy = Battery size needed
My math: 27 kWh × 5 days = 135 kWh needed. I currently run 16 kWh and wish I’d started with 20 kWh. Your mileage will vary.
EG4 LifePower4 [V2] 48V 100AH Lithium Battery
This is the workhorse. 5.12 kWh per unit, 7,000+ cycles, stacks up to six units for massive capacity. UL Listed. Proven in the field. I’d run these if I were building fresh today.
EG4®-LL-S 48V / 100AH Lithium Battery
Compact, efficient, scalable. The 10-year warranty is substantial. Good if you’re planning to expand later without full replacement.
Rich Solar ALPHA 5 PRO Server Rack Battery
Premium option. Self-heating for cold climates—this matters if you’re in Minnesota or upstate Maine. 7,000 lifetime cycles, proper LiFePO4 chemistry.
The Inverter: Where DC Becomes AC (And Your Life Becomes Possible)
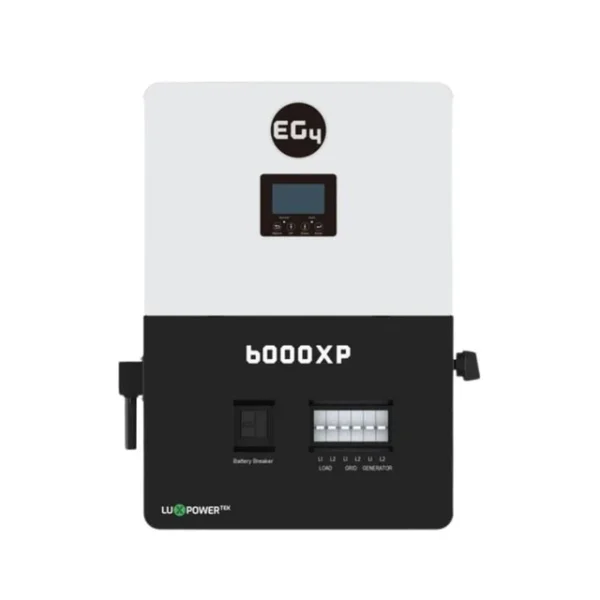
Your inverter is where the magic happens—literally converting stored power into the current that runs your kettle, charges your laptop, powers your well pump. But it’s also where things go catastrophically wrong if you undersized or bought cheap.
I learned this the hard way during a thunderstorm. Cheap inverter, voltage spike, $800 replacement. Now I invest in “pure sine wave” inverters and I size for peak load plus 20% headroom.
Inverter Sizing:
Largest appliance wattage × 1.2 = Minimum inverter size
If your well pump draws 5,000 watts, you need a 6,000W inverter minimum. Smaller systems can sometimes get away with 3,000–4,000W. Larger homes need 8,000W+. Ask yourself: what’s the biggest thing I’ll run simultaneously?
Sol-Ark Inverter | 8K, 12K, 15K
All-in-one hybrid beast. Built-in charge controller, transfer switch, generator input. Yes, it’s pricey. But it’s one box instead of five, and the engineering is rock-solid. I’d choose this if budget allowed.
EG4 6K XP Off-Grid Inverter
6,000W pure sine output, handles medium-to-large systems beautifully. MPPT charge controller built in. Solid reliability track record.
The Charge Controller: The Overlooked Guardian
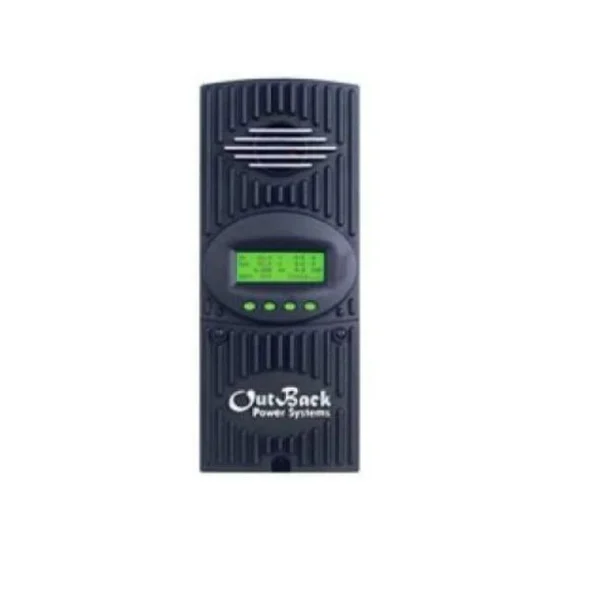
Your charge controller sits between panels and batteries, deciding what juice gets stored and what gets wasted. MPPT (Maximum Power Point Tracking) controllers are 30% more efficient than PWM. That efficiency compounds over years. Get MPPT. Don’t negotiate on this.
Most complete kits include a properly-sized controller, so this often becomes a non-decision if you’re buying bundled. But if building piecemeal, get MPPT or you’ll regret it every winter.
Wiring and Safety: The Part That Saves Your Life (Literally)
I’m going to be blunt: this is where amateur mistakes cause fires.
I’ve seen undersized cables run hot, melting insulation. I’ve seen fuses that were “close enough” rather than exact. I watched a neighbor’s system arc during an electrical storm because he skipped proper grounding.
You need thick cables, proper fuses, solid disconnects, and a 10-foot ground rod. These aren’t luxuries. They’re the difference between a system that runs for twenty years and a system that becomes a liability.
Pair of 10 AWG Solar Panel Extension Cables
Run your panels up to 300 feet from the battery bank. Available in multiple lengths. Get the right gauge or don’t bother.
8 Gauge (AWG) Pair – Black + Red
For larger systems needing heavier copper. Thicker wire means less voltage drop, which means more usable power reaching your batteries.
Inline Fuse Holder w/ Fuse Kit
Non-negotiable. Install one at the panel array, one at the battery bank, one at the inverter. A $20 fuse could prevent a $50,000 fire.
Busbar 250A with Cover – 4 Post
Central hub for battery connections. Looks professional, eliminates tangled wires, reduces fire risk dramatically.
Solar PV Branch Connector Cable Splitter
Safely combines parallel panel strings. Use quality connectors—MC4 is the standard for a reason.
2 x 500 Ft. PV Reel Kit
Bulk wiring for large installations. Choose 10 AWG or 8 AWG based on your system size. Having extra wire is better than making a trip back for more.
Mounting and Racking: Position Determines Performance
Your panels need sunlight, obviously. But they also need angle, airflow, and shade avoidance. A panel lying flat on a roof is almost useless. Angled toward your sun, spaced for cooling air? That’s where the magic happens.
Set of 28″ Solar Panel Stands / Legs
Fully adjustable, portable, works for ground mounts. Compatible with 4–8 panels. I started with these and loved the flexibility.
Z-Bracket Sets for Mounting Solar Panels
For roof or wall mounting. 4 brackets per panel (one per corner). Anodized aluminum handles weather beautifully. Silver or black finish.
Solar Panel Roof Rack Kit
Complete system for roof mounting. Choose your panel quantity (6, 8, 12, 18, or 24 panels). Everything you need except the panels themselves.
Sinclair SkyRack – Ground Mount
Made in USA, engineered steel, holds large arrays. Fixed tilt or seasonal adjustment. Professional-grade, built to last.
The Installation: Eleven Steps to Energy Freedom
Step 1: Know Your Daily Power Consumption
This isn’t theoretical. This is lived. Spend a week watching—every light switch, every appliance, every habit. My tracking sheet looked chaotic, but it revealed patterns: the well pump runs three times daily, the fridge runs constantly, hot water is the biggest load. Total: 27 kWh per day.
Step 2: Calculate Your Panel Array Size
(Daily kWh × 1,000) ÷ Peak sun hours = Watts needed
My math: (27 × 1,000) ÷ 5 = 5,400 watts minimum. I went with 7,200 watts to handle winter degradation and cloudy periods.
Step 3: Size Your Battery Bank
Daily usage × Days of backup = Battery size
27 kWh × 5 days = 135 kWh ideal. I’m running 16 kWh and it works, but 20+ would feel safer.
Step 4: Choose Your Inverter
Peak load × 1.2 = Minimum inverter size
My largest draw is the well pump at 5,000 watts, so I needed a 6,000W minimum. I went with 8,000W for headroom.
Step 5: Design Your System Layout
Draw it out. Seriously. Single-line diagram showing:
- Panel array location and total watts
- Combiner box placement
- DC and AC disconnect switches (critical for safety)
- Charge controller mounting spot
- Battery bank location (consider temperature)
- Inverter placement (near main loads)
- AC breaker panel
- Ground rod location
I used free software (SketchUp), but paper and pencil work too. The point is visualizing before building.
Step 6: Order Everything
Don’t improvise. Order panels, batteries, inverter, wiring, fuses, disconnects, breakers, conduit, conduit fittings, hardware, and ground rod all together. Verify voltage compatibility—all my components are 48V systems. Mix 24V and 48V and nothing works.
Consider a Complete Kit: OGK PLUS Complete System
Step 7: Mount Panels and Racking
This is where you need to be honest about your comfort level. If roof work terrifies you, hire it out. I did mine with a buddy helping—four days of drilling, bolting, triple-checking.
- Mount racking first
- Secure panels with bolts and washers
- Ensure 45° tilt angle (varies by latitude—research your location)
- Leave 2–3 feet of clearance behind panels for airflow
Step 8: Wire Panels in Series/Parallel
This is where physics meets reality. In series, voltages add (4 panels × 100V each = 400V). In parallel, currents add. Most 48V systems use four panels in series (creating a “string”), then run multiple strings in parallel.
I run three strings of four panels each. Total: 12 panels, roughly 5,400 watts nominal.
Step 9: Connect Charge Controller and Battery Bank
This is the delicate dance:
- Install DC disconnect between panels and charge controller
- Wire panels to charge controller input terminals
- Wire charge controller output to battery bank (positive first, negative second—never reverse)
- Install battery disconnect between batteries and inverter
- Use proper gauge wire; use fuses/breakers at every critical connection
I got this wrong my first time. Asked for help. No shame in that.
Step 10: Install Inverter and AC Breaker Panel
- Wire battery bank to inverter DC input
- Install 200A breaker between batteries and inverter (non-negotiable)
- Install AC breaker panel (optional but recommended for organization)
- Wire inverter AC output to breaker panel
- Connect AC loads to breakers
- Install AC disconnect between inverter and loads
Professional electricians will charge $1,500–$3,000 for this step. If you’re confident with wiring, you can do it. If not, hire it out. This is not where to save money.
Step 11: Test Everything Before Powering Up
Get a multimeter. Verify every connection:
- Panel output voltage (should be roughly nominal rating × number in series)
- Battery voltage (should be 48V for 48V systems)
- All connections tight, no corrosion, no loose wires
Start with all disconnects OFF. Turn on DC disconnect to panels. Check charge controller display (should show charging). Turn on battery disconnect. Turn on inverter. Test AC outlets with small loads first (lamp, then microwave). Monitor battery voltage, current flow, state of charge.
Write it all down. You’ll need this documentation later.
Complete Kits vs. Custom DIY: The Real Tradeoff
I’ve done both. Here’s my honest take:
Pre-Built Kits handle the engineering for you. Components are matched, tested, and documented. Installation saves time (roughly 20+ hours of research and decision-making). You get phone support if something goes wrong. Mistakes are less likely.
- OGK PLUS: 3.28kW System
- RPK PLUS: 3,000W RV/Van Kit
- RPK MAX: 6,000W Cabin Kit
- OGK MAX: 7.38kW Premium System
Custom DIY gives you flexibility to upgrade piece by piece, choose specific brands you trust, and expand without full replacement. It’s cheaper if you already understand the technology. It’s riskier if you don’t.
Kits save headaches. Custom saves money if you’re patient and thoughtful.
The Financial Reality: What This Actually Costs
Small System (5 kW): $7,000–$10,000
Medium System (10 kW): $13,000–$20,000
Large System (15 kW): $21,000–$31,000
Rough breakdown:
- Panels: 20–25%
- Batteries: 40–50% (this is where the money lives)
- Inverter & Controller: 15–20%
- Wiring & Safety: 5–8%
- Mounting: 8–12%
Return on Investment:
Compare off-grid solar to alternatives:
- Diesel generators: $10,000/year in fuel plus maintenance
- Grid extension to remote property: $50,000–$100,000
- Utility bills (average): $1,200–$2,000/year
ROI timeline: 10–15 years for most systems. After that, you’re running on sunlight.
Use coupon codes for instant savings:
- SOLAR25: $25 off orders over $500
- SOLAR101: $101 off orders over $2,000
- SOLAR202: $202 off orders over $4,000
The Mistakes You’ll Make (And How I Fixed Mine)
Undersizing Batteries
This is the #1 killer of off-grid dreams. You think 5 kWh will be enough. It won’t. Winter comes, clouds roll in, and suddenly you’re rationing power like it’s wartime.
Fix: Design for 3–5 days of autonomy minimum. If that stretches your budget, start with 2 days and expand within a year.
Ignoring Seasonal Variation
Solar production in February is 50% of June production. If you size for summer, winter will be brutal.
Fix: Use winter peak sun hours for sizing. Size for worst-case. Summer surplus is a luxury, not a requirement.
Buying Cheap Panels
I did this. Watched them underperform for five years. Warranty claims were impossible.
Fix: Tier-1 monocrystalline with 25-year warranties. Spend the extra $200–$400 per panel. You’ll forget you did it.
Skipping Grounding and Breakers
A friend of mine thought this was overkill. During a thunderstorm, his system got fried. Insurance didn’t cover it.
Fix: Install a 10-foot ground rod. Install breakers/fuses at every critical point. It’s cheap insurance.
Not Learning Your System
Most people don’t read the manual. Then something beeps and they panic.
Fix: Take a course. Watch videos. Read manuals. Understand what your system is doing before it fails.
The Solar + Storage Blueprint Course
Living Off-Grid: Actual Human Experience
Real talk: the first winter was harder than I expected. We had two weeks of solid clouds. The battery sat at 22% charge. We ran the generator for six hours per day, which defeated the purpose slightly. But we didn’t go without power. We adapted.
By year two, we understood the rhythm. Summer mornings we could run laundry, water heating, and appliances freely. Winter afternoons we got strategic. Generator use dropped 70%. We were actually doing this.
Daily Power Management Tips:
- Check weather forecasts religiously. Storms coming? Reduce loads before they hit.
- Do high-demand tasks (laundry, water heating) in morning/afternoon when solar production peaks.
- Don’t run multiple high-draw appliances simultaneously. Well pump + water heater + clothes dryer = generator required.
- Monitor your battery state of charge obsessively at first. You’ll develop an intuition for it.
- Keep a detailed log of what works and what doesn’t.
Seasonal Adjustments:
Winter brings clouds, lower sun angles, and longer nights. You increase generator use, add shade reduction (trim trees), or install extra panels. Some folks use battery heaters for cold climates.
Summer brings abundance. You run air conditioning, charge aggressively, maybe even grid-tie (if you have that option).
Maintenance: It’s Simpler Than You Think
Monthly:
- Check battery voltage (should be stable at 48V or your system voltage)
- Visually inspect panels for dirt/debris
- Listen to the charge controller—does it display normal values?
- Monitor state of charge (never let it drop below 20%)
Seasonally:
- Spring: Clean panels, check wires for corrosion
- Summer: Monitor battery temperature (ideal: 60–80°F)
- Fall: Trim trees that shade your array
- Winter: Check for snow/ice on panels, adjust expectations
Real maintenance is surprisingly light. Most systems run for years with minimal attention.
Tools and Skills: What You Actually Need
Skills Required:
- Reading electrical schematics (not PhD-level)
- Using a multimeter (any tool belt person can learn this in minutes)
- Basic carpentry (mounting brackets)
- Ladder safety
- Following instructions meticulously
Tools You’ll Need:
- Wire crimpers and strippers
- Digital multimeter ($15–$30)
- Screwdriver set and wrenches
- Extension ladder (18–20 feet minimum)
- Optional: conduit bender for underground wiring
When to Hire Help:
Honestly? If roof work terrifies you, hire it. If electrical wiring feels over your head, hire an electrician for a few hours of consultation. If your county requires licensed contractor sign-off (some do), respect that.
I hired help for roof-mounted racking. Saved money on the rest.
Professional Help Costs:
- Electrician consultation: $150–$300/hour
- Full-system installation labor: $2,000–$5,000
- Permitting & inspection: $500–$1,500
Permits and Building Codes: Don’t Ignore These
I know. Permits feel like bureaucratic nonsense. But they’re not. They exist because houses burned down from shoddy electrical work.
Most states require permits if:
- System exceeds 2 kW
- You’re in a city or county jurisdiction
- System is connected to your building
- You might sell the property later (inspector will find it)
National Electrical Code (NEC) Compliance:
Your system must follow:
- NEC Article 705 (interconnected systems)
- NEC Article 690 (solar)
Key requirements:
- Proper grounding to earth (10-foot rod minimum)
- DC and AC disconnect switches
- Overcurrent protection (breakers/fuses)
- Correct wire gauges
- GFDI breakers on AC circuits
- Proper labeling
Local Zoning Restrictions:
Some areas have height limits on arrays, setback requirements, HOA restrictions, or neighbor notification requirements. Call your county building department. Seriously.
Insurance Implications:
- Homeowners insurance should cover off-grid systems (confirm with your agent)
- System adds 5–10% to property value
- Professional installation may lower insurance premiums
- Document everything with photos and receipts
The Real Question: Is It Worth It?
Here’s my unfiltered answer: yes, absolutely—if you meet certain conditions.
You’re a good fit for off-grid solar if:
- Your property is remote (grid extension would cost $50,000+)
- You’re willing to learn
- You value independence more than convenience
- You can afford the upfront investment
- You’re committed to maintenance
You should probably skip it if:
- You’re impatient with learning
- You expect “set it and forget it” (it’s not)
- You live in a consistently cloudy climate without generator backup
- You can’t handle monthly monitoring
The math: 10–15 year ROI, then 15+ years of essentially free power. That’s substantial if you stay put.
Ready to Build? Here’s Your Starting Point
If You Want a Pre-Built System:
- OGK PLUS – 3.28kW Cabin System
- RPK PLUS – 3,000W RV/Van Kit
- RPK MAX – 6,000W Larger System
- OGK MAX – 7.38kW Premium System
If You Want to Build Custom:
Solar Panels:
Batteries:
Inverters:
Wiring & Safety:
- 10 AWG Extension Cables
- Inline Fuse Holders
- Solar PV Branch Connectors
- Busbar 250A
- PV Reel Kit 1,000 Ft
Mounting:
Education:
Questions You’re Probably Asking
How much solar do I need?
(Daily kWh × 1,000) ÷ Peak sun hours = Watts needed. Add 20–25% buffer. Most homes need 5–10 kW.
Can I expand later?
Yes. Lithium systems are highly expandable. Start with what you can afford; add batteries as budget allows.
What about cloudy days?
Battery bank supplies power. That’s why 3–5 days of storage is recommended. Beyond that, backup generator bridges the gap.
Do I need a generator?
Not mandatory, but recommended for winter security. Small propane or diesel units run $1,500–$3,000.
Is DIY really cheaper than hiring out?
Yes. You save 30–40% labor ($2,000–$5,000). If electrical work scares you, hire it out. Safety matters more than savings.
How long do panels and batteries last?
Panels: 25–30 years guaranteed. Lithium batteries: 10–15 years with proper care. Both degrade gradually; they don’t just die.
Can I use my system while building it?
Yes. Once panels, charge controller, and battery are connected, power flows. Just don’t close disconnects until final safety checks.
What if I live somewhere cloudy?
You’ll need more capacity (8–12 kW panels instead of 5–8 kW) and larger battery storage. Generator backup becomes essential.
Is off-grid financially worth it?
Yes, if you’re remote (grid extension costs $50,000+), stay 10+ years, and value independence. ROI: 10–15 years. Then 15+ years of free power.
Products & Resources for Your DIY Journey
Complete Kits (Easiest Path):
Individual Components:
Learning Resources:
- The Solar + Storage Blueprint Course
- Free design tools: PVsyst, SketchUp, or paper and pencil
- National Renewable Energy Lab (NREL): PVWatts calculator for location-specific sun hours
- Local building department: Know your permit requirements before building
Building your own off-grid solar system isn’t just about electricity. It’s about owning your power—literally and philosophically. It’s that moment when you stop waiting for utility companies or grid infrastructure to do you right, and instead build something that serves your needs, your location, your future.
That generator in my barn still runs occasionally. But it’s backup now, not lifestyle.
Go build something that matters.

