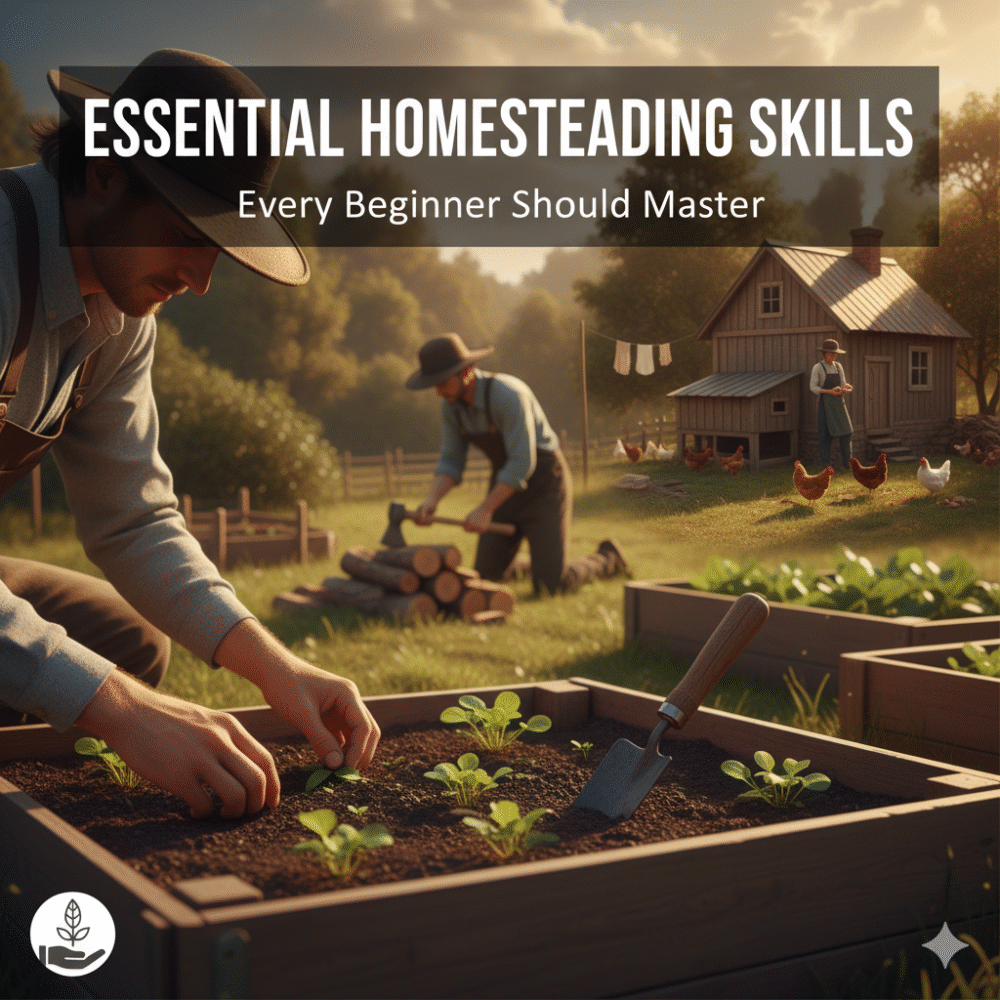
Are you dreaming of a more self-sufficient lifestyle but don’t know where to start with homesteading skills to learn?
You’re not alone.
Thousands of families are discovering the joy and security that comes from growing their own food, raising animals, and living closer to the land.
In fact, over 25% of current homesteaders started within the last three years, with nearly 50% being millennials or Gen Z seeking greater control over their food systems and personal well-being.
In this comprehensive guide, we’ll walk you through everything you need to know about essential homesteading skills, from the basic principles to practical step-by-step instructions.
Whether you’re working with a small urban balcony or planning a full rural homestead, these proven strategies will help you build the sustainable lifestyle you’ve been dreaming of.
What you’ll learn in this guide:
- The fundamental homesteading skills that form your foundation
- Step-by-step instructions for getting started with each skill
- Common mistakes to avoid (and how to fix them)
- Real-world examples from successful homesteaders
- Resources and tools to accelerate your progress
Understanding the Homesteading Skills Hierarchy
Before diving into specific skills, it’s crucial to understand that homesteading is a journey, not a destination.
The key to success is starting with foundational skills that require minimal resources and can be practiced anywhere, then gradually building toward more complex endeavors.
The Three-Tier Approach to Skill Building
Tier 1: Kitchen and Home-Based Skills (Start Here)
These skills require no land, minimal equipment, and can be practiced in any living situation—from apartments to rural properties. They provide immediate benefits and build confidence for more advanced skills.
Tier 2: Small-Scale Production Skills (Build Next)
Once you’ve mastered kitchen basics, expand to small-scale food production like container gardening, herb cultivation, and basic preservation techniques. These skills require modest space and investment.
Tier 3: Advanced Homestead Skills (Expand Later)
After establishing your foundation, move into animal husbandry, large-scale gardening, advanced preservation, and infrastructure development. These require significant commitment but offer the greatest self-sufficiency rewards.
Tier 1: Essential Kitchen and Home-Based Skills

1. Cooking from Scratch
Why It’s Foundational
Cooking from scratch is the single most accessible and impactful homesteading skill. It saves money, improves health, reduces packaging waste, and teaches you to work with basic ingredients—a skill that translates to every other aspect of homesteading.
Getting Started:
- Begin with simple recipes using 5-7 whole ingredients
- Master basic techniques: sautéing, roasting, boiling, baking
- Learn to make staples: bread, yogurt, broth, sauces
- Practice meal planning to reduce waste and save money
- Invest in quality cast iron and stainless steel cookware
Practical Application:
Start by replacing one processed food item per week with a homemade version. For example, make your own salad dressing, bake bread, or prepare dried beans instead of canned.
Track your savings—most families save $200-400 monthly by cooking from scratch.
Common Mistakes to Avoid:
- Trying to eliminate all processed foods overnight (leads to burnout)
- Not planning meals ahead (results in expensive last-minute purchases)
- Buying expensive specialty ingredients before mastering basics
- Comparing your beginning to someone else’s middle
2. Food Preservation Basics
Why It Matters
Food preservation allows you to capture seasonal abundance, reduce waste, and maintain food security year-round. These skills are essential before you start producing large quantities of food.
Core Preservation Methods for Beginners:
Water Bath Canning
Perfect for high-acid foods like jams, pickles, and tomatoes. Requires minimal equipment and is the safest entry point to canning.
Essential Equipment:
- Large pot with lid (or dedicated water bath canner)
- Canning jars, lids, and rings
- Jar lifter and bubble remover
- Tested recipes from reliable sources (USDA, Ball, National Center for Home Food Preservation)
First Projects:
- Strawberry jam or apple butter
- Dill pickles or pickled vegetables
- Tomato sauce with added lemon juice
Dehydration
One of the oldest and simplest preservation methods. Removes moisture that bacteria need to grow.
Methods:
- Electric dehydrator (most consistent results)
- Oven drying (use lowest setting, prop door open)
- Air drying (herbs, hot peppers)
- Solar drying (requires consistent hot, dry weather)
Best Foods to Start With:
- Herbs (basil, oregano, thyme)
- Fruit leathers from overripe fruit
- Tomatoes for sun-dried tomatoes
- Apple chips and banana chips
Freezing
The easiest preservation method, though it requires ongoing energy input.
Best Practices:
- Blanch vegetables before freezing to preserve color and nutrients
- Use vacuum sealing or remove as much air as possible
- Label everything with contents and date
- Maintain freezer at 0°F or below
- Organize with oldest items in front
Fermentation
Creates beneficial probiotics while preserving food. Requires no special equipment and actually increases nutritional value.
Beginner Ferments:
- Sauerkraut (just cabbage and salt)
- Fermented pickles (cucumbers, salt, water, spices)
- Yogurt (milk and starter culture)
- Kombucha (tea, sugar, SCOBY)
Pro Tip: Practice preservation techniques on inexpensive store-bought or foraged foods before harvest season. This builds confidence without the pressure of preserving your precious homegrown produce.
3. Composting and Waste Management
Why It’s Essential
Composting transforms kitchen scraps and yard waste into “black gold” for your garden while reducing landfill waste by 30-50%. It’s free fertilizer that improves soil structure, water retention, and plant health.
Composting Methods for Different Situations:
Traditional Compost Bin (Suburban/Rural)
- Build or buy a 3x3x3 foot bin
- Layer “greens” (nitrogen: food scraps, grass clippings) with “browns” (carbon: leaves, cardboard)
- Maintain moisture like a wrung-out sponge
- Turn weekly for faster decomposition
- Harvest finished compost in 2-6 months
Vermicomposting (Urban/Indoor)
- Perfect for apartments and small spaces
- Red wiggler worms eat food scraps and produce nutrient-rich castings
- Requires minimal space (under sink, closet, balcony)
- Produces compost in 3-4 months
- Bonus: worm tea liquid fertilizer
Bokashi Composting (All Situations)
- Ferments food waste (including meat and dairy)
- Uses special bran inoculated with beneficial microbes
- Odor-free and pest-free
- Works in 2-4 weeks
- Pre-composts material for traditional bin or burial
What to Compost:
- Fruit and vegetable scraps
- Coffee grounds and filters
- Tea bags (remove staples)
- Eggshells (crushed)
- Yard waste (grass, leaves, small twigs)
- Shredded paper and cardboard
- Wood ash (small amounts)
What NOT to Compost:
- Meat, bones, or fish (attracts pests)
- Dairy products
- Oils and fats
- Pet waste
- Diseased plants
- Weeds with seeds
4. Basic Sewing and Mending
Why It Saves Money
The average American throws away 81 pounds of clothing annually. Learning basic sewing and mending can extend clothing life by years, saving hundreds of dollars while reducing waste.
Essential Skills to Learn:
- Hand sewing: running stitch, backstitch, whip stitch
- Button replacement and reinforcement
- Hem repair and adjustment
- Patch application for holes and tears
- Zipper replacement
- Basic machine sewing (if you have access)
First Projects:
- Mend torn seams
- Replace missing buttons
- Hem pants or skirts
- Patch jeans with iron-on patches
- Create simple tote bags from old t-shirts
Minimal Tool Kit:
- Needles (various sizes)
- Thread (basic colors)
- Scissors
- Pins and safety pins
- Seam ripper
- Measuring tape
- Thimble
5. Natural Cleaning Products
Why Make Your Own
Commercial cleaning products contain harsh chemicals, come in plastic packaging, and cost significantly more than homemade alternatives. DIY cleaners are safer for families, pets, and the environment.
Essential Ingredients (Under $20 total):
- White vinegar (disinfectant, deodorizer)
- Baking soda (abrasive, deodorizer)
- Castile soap (gentle cleaner)
- Essential oils (optional, for scent)
- Lemon juice (natural bleach, degreaser)
Basic Recipes:
All-Purpose Cleaner
- 1 cup water
- 1 cup white vinegar
- 10-20 drops essential oil (optional)
Mix in spray bottle. Use on counters, sinks, appliances.
Scouring Powder
- 1 cup baking soda
- 1/4 cup salt
- Essential oil (optional)
Use for tubs, sinks, tough stains.
Glass Cleaner
- 2 cups water
- 1/4 cup white vinegar
- 1/2 teaspoon dish soap
Spray and wipe with newspaper or microfiber cloth.
Laundry Detergent
- 1 bar grated castile soap
- 1 cup washing soda
- 1 cup borax
Use 1-2 tablespoons per load.
Tier 2: Small-Scale Food Production Skills

6. Container and Small-Space Gardening
Why Start Here
Container gardening requires no land ownership, minimal investment, and teaches fundamental plant care before scaling up. It’s perfect for apartments, rentals, and testing your green thumb.
Best Crops for Containers:
Herbs (Easiest)
- Basil, parsley, cilantro, chives
- Oregano, thyme, rosemary, mint
- 6-8 inch pots, well-draining soil
- Harvest regularly to encourage growth
Salad Greens (Quick Results)
- Lettuce, spinach, arugula, kale
- Shallow containers (6-8 inches deep)
- Succession plant every 2 weeks
- Harvest outer leaves continuously
Tomatoes (High Yield)
- Cherry tomatoes best for containers
- 5-gallon bucket minimum
- Determinate varieties for limited space
- Requires staking or caging
Peppers (Long Season)
- Sweet or hot varieties
- 3-5 gallon containers
- Warm location with 6+ hours sun
- Harvest when fully colored
Root Vegetables (Unique)
- Radishes (25 days to harvest)
- Carrots (deep containers, 12+ inches)
- Beets (moderate depth, 8-10 inches)
- Potatoes (grow bags or buckets)
Container Gardening Success Tips:
- Use quality potting mix, not garden soil
- Ensure drainage holes in all containers
- Water consistently (containers dry faster)
- Fertilize regularly (nutrients leach out)
- Group containers for microclimate benefits
- Start with 3-5 containers, not 30
7. Seed Starting and Propagation
Why It’s Valuable
Starting plants from seed costs pennies compared to buying transplants. It also gives you access to hundreds of varieties not available at nurseries and teaches you the complete plant lifecycle.
Basic Seed Starting Setup:
Minimal Equipment:
- Seed starting trays or recycled containers
- Seed starting mix (not potting soil)
- Seeds from reliable sources
- Light source (south window or grow lights)
- Heat mat (optional but helpful)
- Labels and markers
Step-by-Step Process:
1. Fill containers with moistened seed starting mix
2. Plant seeds at proper depth (usually 2x seed diameter)
3. Cover with humidity dome or plastic wrap
4. Place in warm location (70-75°F ideal)
5. Remove cover once seeds sprout
6. Provide 12-16 hours of light daily
7. Keep soil consistently moist, not soggy
8. Fertilize with diluted liquid fertilizer after true leaves appear
9. Harden off before transplanting outdoors
Easy Seeds to Start:
- Tomatoes (start 6-8 weeks before last frost)
- Peppers (start 8-10 weeks before last frost)
- Herbs (basil, parsley, cilantro)
- Lettuce and greens (direct sow or start indoors)
- Squash and cucumbers (start 3-4 weeks before last frost)
Propagation Techniques:
Cuttings
Many plants can be grown from cuttings:
- Herbs (basil, mint, rosemary)
- Tomatoes (root suckers in water)
- Houseplants (pothos, philodendron)
- Berries (blackberries, currants)
Division
Split mature plants to create new ones:
- Perennial herbs (chives, oregano)
- Perennial vegetables (rhubarb, asparagus)
- Ornamental perennials
8. Soil Health and Improvement
Why Soil Comes First
Healthy soil is the foundation of successful gardening. Poor soil leads to weak plants, pest problems, and disappointing harvests. Investing in soil health pays dividends for years.
Understanding Your Soil:
Soil Testing
- Get professional test from extension office ($10-30)
- Tests pH, nutrients, organic matter
- Provides specific amendment recommendations
- Test every 2-3 years
DIY Soil Assessment:
- Jar test for soil texture (sand, silt, clay ratios)
- Drainage test (dig hole, fill with water, time drainage)
- Earthworm count (healthy soil has 10+ per cubic foot)
- Smell test (healthy soil smells earthy, not sour)
Improving Soil Structure:
Add Organic Matter
- Compost (2-4 inches annually)
- Aged manure (not fresh)
- Leaf mold
- Cover crops (green manure)
Mulching Benefits
- Retains moisture
- Suppresses weeds
- Moderates soil temperature
- Feeds soil organisms as it breaks down
- Apply 2-4 inches, keep away from plant stems
No-Till Practices
- Preserves soil structure
- Protects beneficial organisms
- Reduces erosion
- Saves time and energy
- Use broadfork for gentle aeration
9. Water Management and Conservation
Why It Matters
Water is increasingly precious. Efficient water management reduces bills, conserves resources, and ensures plant health during dry periods.
Rainwater Harvesting Basics:
Simple Systems:
- Rain barrels at downspouts (55-gallon drums)
- First-flush diverters to remove debris
- Overflow management
- Mosquito prevention (screens, lids)
- Gravity-fed distribution
Calculations:
- 1 inch of rain on 1,000 sq ft roof = 600 gallons
- Average roof captures 20,000-40,000 gallons annually
- Even small systems provide significant irrigation water
Efficient Irrigation:
Drip Irrigation
- Delivers water directly to roots
- Reduces evaporation by 50%
- Prevents foliar diseases
- Can be automated with timers
- DIY systems cost $50-200
Soaker Hoses
- Porous hoses that weep water
- Lay on soil surface or under mulch
- Less efficient than drip but easier to install
- Good for row crops and beds
Hand Watering Best Practices
- Water deeply and less frequently
- Water early morning or evening
- Direct water to soil, not leaves
- Use watering wand for gentle delivery
- Mulch to retain moisture
10. Basic Food Preservation: Canning and Dehydrating
Expanding Your Preservation Skills
Once you’re producing food, preservation becomes critical. These skills prevent waste and provide food security year-round.
Water Bath Canning Deep Dive:
Safety First
- Only can high-acid foods (pH below 4.6)
- Use tested recipes from reliable sources
- Process for full recommended time
- Check seals after cooling
- Store in cool, dark place
- Discard any questionable jars
Canning Seasonal Produce:
Spring:
- Strawberry jam
- Rhubarb sauce
- Pickled asparagus
Summer:
- Tomato sauce and salsa
- Dill pickles
- Peach and berry jams
- Bread and butter pickles
Fall:
- Apple butter and applesauce
- Pear preserves
- Pickled beets
- Grape jelly
Dehydration Techniques:
Preparing Foods:
- Wash and dry thoroughly
- Cut uniformly for even drying
- Pre-treat fruits to prevent browning (lemon juice, ascorbic acid)
- Blanch vegetables for better color and nutrition retention
Drying Times and Temperatures:
- Herbs: 95-115°F, 2-4 hours
- Fruits: 135°F, 6-12 hours
- Vegetables: 125°F, 4-10 hours
- Meats (jerky): 145-165°F, 4-6 hours
Storage:
- Cool completely before packaging
- Use airtight containers or vacuum seal
- Store in cool, dark, dry location
- Check periodically for moisture
- Use within 6-12 months for best quality
Tier 3: Advanced Homestead Skills
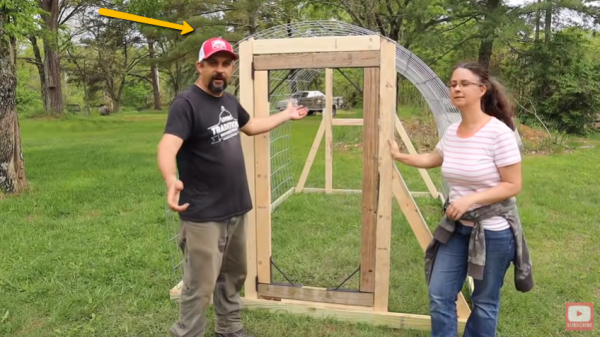
11. Backyard Chickens (Your First Livestock)
Why Chickens Are Perfect for Beginners
Chickens are the gateway livestock for good reason: they’re relatively easy to care for, require modest space, provide daily eggs, and teach fundamental animal husbandry skills.
Before You Get Chickens:
- Check local zoning laws and HOA rules
- Ensure you can commit to daily care
- Plan for vacation coverage
- Budget for setup and ongoing costs
- Decide on flock size (start with 3-5 birds)
Essential Setup:
Coop Requirements:
- 4 square feet per bird inside
- 10 square feet per bird in run
- Predator-proof construction
- Adequate ventilation without drafts
- Easy access for cleaning
- Nesting boxes (1 per 4-5 hens)
- Roosting bars (8-10 inches per bird)
Daily Care:
- Fresh water (change daily)
- Feed (layer pellets as base)
- Collect eggs
- Quick health check
- Secure coop at night
Weekly Care:
- Deep clean waterers
- Refill feeders
- Add bedding as needed
- Check for pests
- Inspect fencing
Monthly Care:
- Full coop cleaning
- Replace bedding
- Inspect for damage
- Trim overgrown nails if needed
Breed Selection for Beginners:
- Rhode Island Red: Hardy, excellent layers
- Buff Orpington: Gentle, cold-hardy, dual-purpose
- Australorp: Prolific layers, calm
- Barred Rock: Reliable, good foragers
- Easter Egger: Colorful eggs, friendly
12. Herb Gardening and Medicinal Plants
Why Herbs Are Essential
Herbs are among the easiest plants to grow, require minimal space, and provide culinary, medicinal, and pest-control benefits. They’re perfect for beginners and offer quick rewards.
Culinary Herbs (Start Here):
Basil
- Annual, loves heat
- Pinch flowers to encourage leaf growth
- Harvest regularly for bushier plants
- Dozens of varieties (sweet, Thai, lemon, purple)
Parsley
- Biennial, slow to germinate
- Flat-leaf (Italian) or curly
- Rich in vitamins and minerals
- Harvest outer leaves first
Cilantro
- Cool-season annual
- Bolts quickly in heat
- Succession plant every 2-3 weeks
- Seeds (coriander) also useful
Rosemary
- Perennial in warm climates
- Drought-tolerant once established
- Woody stems, needle-like leaves
- Excellent for meat dishes
Thyme
- Low-growing perennial
- Many varieties (lemon, creeping, common)
- Drought-tolerant
- Harvest before flowering for best flavor
Medicinal Herbs (Expand Gradually):
Chamomile
- Calming tea for sleep and digestion
- Self-seeds readily
- Harvest flowers when fully open
- Dry for tea
Calendula
- Skin-healing properties
- Edible flowers
- Easy to grow annual
- Use in salves and oils
Echinacea
- Immune system support
- Beautiful purple flowers
- Perennial, drought-tolerant
- Use roots and flowers
Lavender
- Calming, antiseptic
- Perennial, loves sun and drainage
- Harvest before flowers fully open
- Use in sachets, teas, salves
Peppermint
- Digestive aid
- Vigorous grower (contain it!)
- Harvest before flowering
- Dry for tea
13. Season Extension Techniques
Why Extend Your Season
Season extension allows you to grow food 8-12 months per year instead of just 3-4 months. This dramatically increases self-sufficiency and provides fresh food during winter.
Cold Frames
- Simple box with transparent lid
- Captures solar heat
- Protects from wind and frost
- DIY from old windows or polycarbonate
- Extends season 4-6 weeks on each end
Row Covers
- Lightweight fabric draped over plants
- Protects from frost (3-8°F protection)
- Allows light and water through
- Reusable for multiple seasons
- Inexpensive season extension
Low Tunnels
- Hoops covered with plastic or row cover
- Taller than row covers, easier access
- Can extend season 6-8 weeks
- Requires ventilation on warm days
- Good for greens, brassicas, root crops
High Tunnels/Hoop Houses
- Walk-in structures
- Significant investment ($500-5,000+)
- Year-round growing in many climates
- Requires active management
- Best for serious growers
Winter Gardening Crops:
- Kale, collards, spinach
- Carrots, beets, turnips
- Lettuce, arugula, mâche
- Asian greens (bok choy, mizuna)
- Leeks, scallions
14. Seed Saving
Why Save Seeds
Seed saving reduces costs, preserves genetic diversity, adapts plants to your specific conditions, and connects you to agricultural heritage. It’s also deeply satisfying.
Best Seeds for Beginners:
Easy Seeds:
- Tomatoes (ferment method)
- Beans and peas (dry on plant)
- Lettuce (let bolt, collect seeds)
- Herbs (cilantro, dill, basil)
- Squash (scoop, clean, dry)
Moderate Difficulty:
- Peppers (dry method)
- Cucumbers (ferment method)
- Melons (clean and dry)
- Brassicas (let flower, collect pods)
Challenging (Learn Later):
- Corn (requires isolation)
- Carrots (biennial, needs overwintering)
- Onions (biennial)
- Beets (biennial)
Seed Saving Basics:
Selection:
- Save from healthiest, most productive plants
- Choose plants with desired characteristics
- Avoid diseased or weak plants
- Save from multiple plants for genetic diversity
Processing:
- Dry seeds thoroughly before storage
- Clean seeds to remove chaff and debris
- Label immediately with variety and date
- Store in cool, dry, dark location
- Use paper envelopes or glass jars
Storage:
- Most seeds viable 2-5 years
- Some (onions, parsnips) only 1-2 years
- Others (tomatoes, beans) 4-6 years
- Test germination before planting season
- Store in refrigerator for longest life
15. Basic Carpentry and Repairs
Why DIY Skills Matter
Homesteading requires constant building and repair. Basic carpentry skills save thousands of dollars and allow you to customize solutions for your specific needs.
Essential Skills to Learn:
Measuring and Cutting:
- Accurate measuring and marking
- Using a circular saw safely
- Cutting straight lines
- Making square cuts
- Understanding lumber dimensions
Fastening:
- Driving nails properly
- Using screws and drill/driver
- Choosing appropriate fasteners
- Pre-drilling to prevent splitting
- Countersinking screws
Basic Joinery:
- Butt joints
- Lap joints
- Pocket hole joinery
- Using wood glue effectively
First Projects:
- Raised garden beds
- Compost bins
- Simple shelving
- Chicken coop (from plans)
- Tool storage
Essential Tools:
- Tape measure
- Speed square
- Circular saw or hand saw
- Drill/driver
- Hammer
- Level
- Clamps
- Safety glasses
Creating Your Personalized Learning Path
Assess Your Starting Point
Current Situation Inventory:
- Living situation (apartment, house, rural property)
- Available space (indoor, balcony, yard)
- Time commitment (hours per week)
- Budget for initial investments
- Family support and involvement
- Existing skills and experience
Set Realistic Goals
Year One Goals (Examples):
- Cook from scratch 5 nights per week
- Grow 25% of summer vegetables
- Preserve 20 jars of food
- Start composting system
- Learn 3 new skills
Year Two Goals (Examples):
- Expand garden by 50%
- Add chickens for eggs
- Preserve 50+ jars
- Grow herbs year-round
- Master bread baking
Year Three Goals (Examples):
- Produce 50% of vegetables
- Add fruit trees or berries
- Preserve 100+ jars
- Expand livestock
- Generate income from homestead
Track Your Progress
Keep Records:
- Garden journal (plantings, harvests, observations)
- Preservation log (what, when, how much)
- Expense tracking (investments and savings)
- Skill development checklist
- Photos for visual progress
Celebrate Milestones:
- First successful harvest
- First preserved foods
- First eggs from chickens
- First meal entirely from homestead
- First year of consistent practice
Common Challenges and How to Overcome Them
Challenge 1: Feeling Overwhelmed
Solution:
- Focus on one skill at a time
- Start with Tier 1 skills before advancing
- Set small, achievable weekly goals
- Join supportive communities
- Remember that every expert was once a beginner
Challenge 2: Limited Budget
Solution:
- Start with free or low-cost skills (cooking, composting)
- Use recycled materials whenever possible
- Buy used equipment and tools
- Start small and reinvest savings
- Focus on skills that save money immediately
Challenge 3: Limited Space
Solution:
- Master container gardening
- Utilize vertical growing techniques
- Focus on high-value crops
- Use community gardens if available
- Prioritize skills that don’t require land
Challenge 4: Limited Time
Solution:
- Design efficient systems
- Batch similar tasks together
- Start with low-maintenance skills
- Involve family members
- Accept that slow progress is still progress
Challenge 5: Family Resistance
Solution:
- Start with projects everyone enjoys
- Let family members choose areas of interest
- Share the benefits (fresh food, cost savings)
- Make it fun, not a chore
- Lead by example without pressure
Challenge 6: Initial Failures
Solution:
- Expect and accept failures as learning opportunities
- Start with easy, forgiving projects
- Research common mistakes beforehand
- Join communities for troubleshooting help
- Document what went wrong to avoid repeating
Building Your Support Network
Local Resources
Extension Offices:
- Free or low-cost classes
- Soil testing services
- Research-based publications
- Master gardener programs
- Local growing information
Community Gardens:
- Hands-on learning
- Shared tools and resources
- Experienced mentors
- Social connections
- Low-cost garden space
Farmers Markets:
- Connect with local growers
- Learn what grows well locally
- Source seeds and plants
- Build relationships with producers
- Potential sales outlet later
Local Homesteading Groups:
- Skill shares and workshops
- Seed swaps
- Tool lending libraries
- Bulk purchasing cooperatives
- Emotional support and encouragement
Online Resources
Recommended Websites:
- University extension websites (research-based)
- National Center for Home Food Preservation
- Homesteading forums and communities
- YouTube channels from experienced homesteaders
- Blogs from homesteaders in similar climates
Social Media:
- Facebook homesteading groups
- Instagram for inspiration and tips
- Pinterest for project ideas
- Reddit homesteading communities
- Online courses and webinars
Books and Publications
Essential Reading:
- “The Backyard Homestead” by Carleen Madigan
- “The Self-Sufficient Life and How to Live It” by John Seymour
- “Square Foot Gardening” by Mel Bartholomew
- “The Ball Complete Book of Home Preserving”
- “Storey’s Guide” series for specific topics
Measuring Your Success
Quantitative Metrics
Food Production:
- Pounds of food harvested
- Percentage of diet from homestead
- Number of meals from homegrown ingredients
- Jars of preserved food
Financial:
- Money saved on groceries
- Reduction in household expenses
- Income generated (if applicable)
- Return on investment for equipment
Skill Development:
- Number of new skills learned
- Skills mastered vs. attempted
- Confidence level in each skill area
- Teaching opportunities (sign of mastery)
Qualitative Measures
Personal Growth:
- Increased confidence and self-reliance
- Improved problem-solving abilities
- Greater connection to food and seasons
- Enhanced patience and persistence
- Deeper appreciation for nature
Family Impact:
- Quality time spent together
- Children’s learning and development
- Improved family health
- Shared sense of accomplishment
- Stronger family bonds
Community Connection:
- Relationships built through homesteading
- Knowledge shared with others
- Participation in local food systems
- Contribution to community resilience
Taking Action: Your 30-Day Jumpstart Plan
Week 1: Foundation and Planning
- Day 1-2: Assess your current situation and set goals
- Day 3-4: Choose 3 Tier 1 skills to focus on first
- Day 5-6: Gather basic supplies and equipment
- Day 7: Start your first skill (cooking from scratch)
Week 2: Kitchen Mastery
- Day 8-10: Cook from scratch daily, try 3 new recipes
- Day 11-12: Make your first batch of homemade cleaning products
- Day 13-14: Start composting system
Week 3: Growing Begins
- Day 15-17: Set up container garden or start seeds indoors
- Day 18-19: Research and plan larger garden space
- Day 20-21: Practice basic preservation (dehydrate herbs or make jam)
Week 4: Integration and Expansion
- Day 22-24: Establish daily homesteading routines
- Day 25-26: Connect with local resources and communities
- Day 27-28: Plan next skills to learn
- Day 29-30: Reflect on progress and adjust goals
Your Homesteading Journey Starts Now
Mastering essential homesteading skills is a journey that requires patience, practice, and persistence. The techniques and strategies outlined in this guide provide a solid foundation for success, but remember that every homestead is unique. Adapt these methods to your specific situation, climate, and goals.
The beauty of homesteading is that you can start exactly where you are, with what you have. You don’t need land, expensive equipment, or years of experience to begin. Start with one skill—perhaps cooking from scratch or starting a small container garden—and build from there. Each skill you master opens doors to new possibilities and greater self-sufficiency.
Remember these key principles as you begin:
Start Small: Master one skill before adding another. It’s better to do a few things well than many things poorly.
Be Patient: Homesteading skills take time to develop. Give yourself grace during the learning process.
Stay Consistent: Small, regular actions compound over time. Fifteen minutes daily beats occasional marathon sessions.
Learn from Failures: Every mistake is a lesson. Document what went wrong so you can improve next time.
Build Community: Connect with other homesteaders for support, knowledge sharing, and encouragement.
Celebrate Progress: Acknowledge every milestone, no matter how small. Each step forward is worth celebrating.
The homesteading community is incredibly supportive and generous with knowledge sharing. Don’t hesitate to ask questions, seek advice, and share your own experiences. Your journey will inspire others who are just beginning, and your challenges will help others avoid similar pitfalls.
Most importantly, enjoy the process. Homesteading isn’t just about the end goal of self-sufficiency—it’s about the daily satisfaction of working with your hands, connecting with natural cycles, and building a more intentional, sustainable life.
Every seed you plant, every jar you preserve, and every skill you master is a step toward greater resilience, independence, and fulfillment.
Your homesteading journey starts now. Take that first step today, and trust that each subsequent step will become clearer as you progress.
The skills you’re about to learn will serve you and your family for a lifetime, creating a legacy of self-reliance and sustainability for generations to come.
Pin This Guide: Save this comprehensive guide to your Pinterest boards so you can reference it as you develop your homesteading skills!