Are you dreaming of a more self-sufficient lifestyle but don’t know where to start with homestead food preservation? You’re not alone. Thousands of families are discovering the joy and security that comes from growing their own food, raising animals, and living closer to the land.
In this comprehensive guide, we’ll walk you through everything you need to know about homestead food preservation, from the basic principles to practical step-by-step instructions. Whether you’re working with a small backyard or planning a full rural homestead, these proven strategies will help you build the sustainable lifestyle you’ve been dreaming of.
What you’ll learn in this guide:
- The fundamental principles of homestead food preservation
- Step-by-step instructions for getting started
- Common mistakes to avoid (and how to fix them)
- Real-world examples from successful homesteaders
- Resources and tools to accelerate your progress
Mastering Homestead Food Preservation for Year-Round Food Security
Homestead Food Preservation is essential for homestead food security, allowing you to capture the abundance of harvest season and enjoy homegrown food throughout the year. These time-tested techniques not only preserve nutrition and flavor but also save money and reduce dependence on store-bought foods.
Understanding Food Preservation Science
Why Foods Spoil
Food spoilage occurs due to:
- Bacterial and microbial growth
- Enzyme activity within foods
- Oxidation and chemical changes
- Moisture content and water activity
- Temperature and storage conditions
Preservation Methods Overview
Each method works by controlling one or more spoilage factors:
- Canning: Heat destroys microorganisms
- Dehydrating: Removes moisture needed for growth
- Freezing: Slows microbial and enzyme activity
- Fermentation: Creates acidic environment
- Salt curing: Draws out moisture and inhibits bacteria
- Smoking: Combines heat, dehydration, and antimicrobial compounds
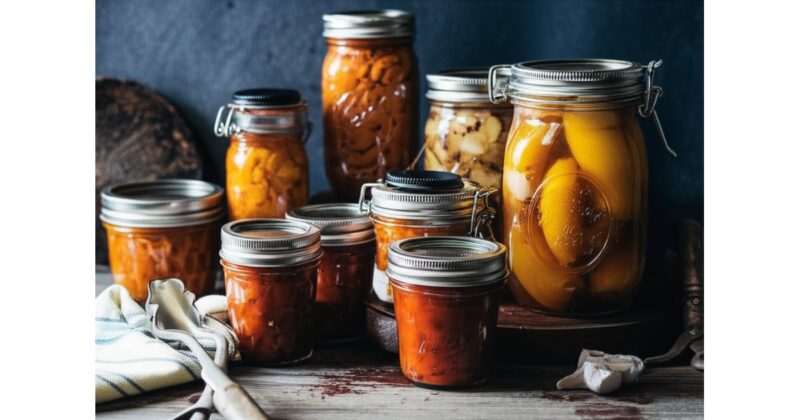
Water Bath Canning Fundamentals
Safe Foods for Water Bath Canning
Only high-acid foods (pH 4.6 or lower) are safe:
- Most fruits and fruit products
- Jams, jellies, and preserves
- Pickles and pickled vegetables
- Tomatoes with added acid
- Fruit salsas and chutneys
Essential Equipment
- Large, deep pot with tight-fitting lid
- Canning rack to hold jars off bottom
- Canning jars with new lids and rings
- Jar lifter for safe handling
- Bubble removal tool and headspace gauge
Step-by-Step Process
1. Prepare canning jars and lids according to manufacturer instructions
2. Prepare food according to tested recipe
3. Fill jars leaving proper headspace
4. Remove air bubbles and adjust headspace
5. Wipe jar rims clean and apply lids
6. Process in boiling water bath for specified time
7. Cool completely and check for proper seal
Pressure Canning for Low-Acid Foods
When Pressure Canning is Required
Low-acid foods (pH above 4.6) need higher temperatures:
- Vegetables (except pickled)
- Meats, poultry, and seafood
- Beans and legumes
- Soups and stews
- Mixed dishes with low-acid ingredients
Pressure Canner vs. Pressure Cooker
- Pressure canners have accurate pressure gauges
- Larger capacity for multiple jars
- Designed specifically for canning safety
- Pressure cookers are not recommended for canning
Critical Safety Points
- Use only tested recipes from reliable sources
- Adjust processing time for altitude
- Maintain proper pressure throughout process
- Allow natural pressure release
- Check gauge accuracy annually
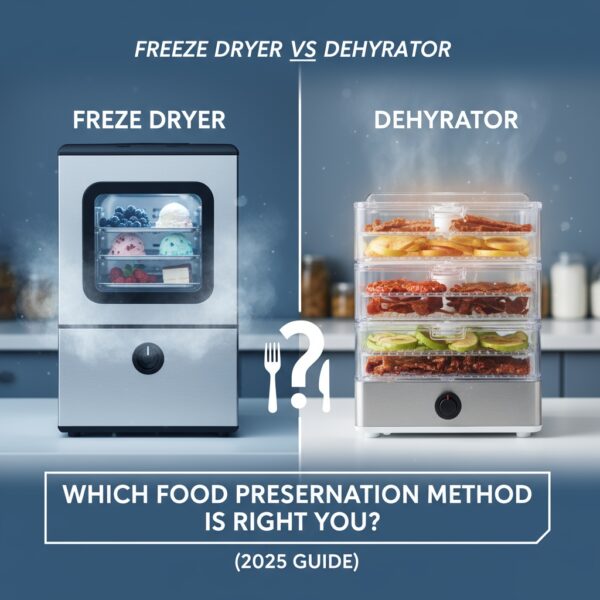
Dehydration Techniques
Methods of Dehydration
- Electric dehydrators: Consistent temperature and airflow
- Oven drying: Use lowest setting with door cracked
- Air drying: Traditional method for herbs and some fruits
- Solar drying: Environmentally friendly option
Preparing Foods for Dehydration
- Wash and prepare foods properly
- Cut into uniform pieces for even drying
- Pre-treat fruits to prevent browning
- Blanch vegetables to preserve color and nutrition
- Remove excess moisture before starting
Storage of Dehydrated Foods
- Cool completely before packaging
- Store in airtight containers
- Keep in cool, dark, dry locations
- Use vacuum sealing for longer storage
- Label with contents and date
Fermentation for Preservation
Benefits of Fermentation
- Increases nutritional value
- Improves digestibility
- Creates beneficial probiotics
- Develops complex flavors
- Preserves food safely without heat
Basic Fermentation Principles
- Create anaerobic (oxygen-free) environment
- Use proper salt concentrations
- Maintain appropriate temperatures
- Monitor pH levels for safety
- Use clean equipment and techniques
Popular Fermented Foods
- Sauerkraut and fermented vegetables
- Kimchi and other cultured vegetables
- Fermented dairy products
- Sourdough breads and starters
- Fermented beverages like kombucha
Root Cellars and Cold Storage
Traditional Storage Methods
Root cellars provide ideal conditions for many crops:
- Consistent cool temperatures (32-40°F)
- High humidity (85-95%)
- Good air circulation
- Protection from light
- Easy access for monitoring
Crops Suitable for Root Cellar Storage
- Root vegetables: carrots, beets, turnips, potatoes
- Cabbage family: cabbage, Brussels sprouts
- Apples and pears (in separate areas)
- Onions and garlic (in dry storage)
- Winter squash and pumpkins
Modern Alternatives
- Refrigerator root cellaring
- Basement storage areas
- Outdoor storage clamps
- Controlled atmosphere storage
- Modified atmosphere packaging
Advanced Preservation Techniques
Combination Methods
Combining Preservation Techniques
- Smoke and salt curing for meats
- Dehydration followed by vacuum sealing
- Fermentation with refrigerated storage
- Canning with added preservation methods
- Freeze-drying for long-term storage
Value-Added Processing
Creating Marketable Products
- Specialty jams and preserves
- Pickled and fermented vegetables
- Dried herb and spice blends
- Smoked and cured meats
- Artisanal fermented foods
Food Safety Regulations
- Understand cottage food laws
- Follow commercial processing requirements
- Maintain proper documentation
- Use approved recipes and methods
- Consider liability insurance
Quality Control and Testing
Monitoring Preservation Success
- Check seals on canned goods regularly
- Monitor storage conditions continuously
- Test pH levels when appropriate
- Inspect for signs of spoilage
- Rotate stock using first-in, first-out
Troubleshooting Common Problems
- Seal failures in canned goods
- Over-drying or under-drying issues
- Fermentation problems and solutions
- Storage pest management
- Quality degradation over time

>
Economic Benefits of Homestead Food Preservation
Cost Savings Analysis
- Reduced grocery bills year-round
- Bulk processing of seasonal abundance
- Elimination of food waste
- Energy savings compared to freezing
- Reduced packaging and transportation costs
Income Generation Opportunities
- Farmers market sales
- Community-supported agriculture (CSA)
- Online sales and shipping
- Workshops and classes
- Custom processing services
Investment in Equipment
- Calculate return on investment for equipment
- Start with basic tools and upgrade gradually
- Share expensive equipment with neighbors
- Consider multi-purpose equipment
- Maintain equipment for longevity

>
Safety and Best Practices
Food Safety Fundamentals
- Use only tested, approved recipes
- Follow processing times and temperatures exactly
- Maintain clean work environment
- Monitor storage conditions regularly
- When in doubt, throw it out
Record Keeping
- Document processing dates and methods
- Track storage conditions and locations
- Monitor inventory and rotation
- Record any problems or failures
- Maintain equipment maintenance logs
Continuous Learning
- Stay updated on current recommendations
- Attend workshops and classes
- Join preservation communities
- Test new methods carefully
- Share knowledge with others
Success with homestead food preservation requires attention to detail, commitment to safety, and continuous learning. Start with simple methods and gradually expand your skills as you gain experience and confidence. The investment in time and equipment pays dividends in food security, cost savings, and the satisfaction of providing healthy, homegrown food for your family year-round.
Building Your Homestead Food Preservation Success
The path to mastering homestead food preservation is unique for every homesteader, but the principles remain consistent: start where you are, use what you have, and do what you can. Every expert was once a beginner, and every successful homestead started with a single step.
Focus on continuous improvement rather than perfection. Small, consistent actions compound over time to create remarkable results. Trust the process, stay committed to your goals, and remember that setbacks are temporary while the skills you’re building will serve you for a lifetime.
Your journey with homestead food preservation is not just about achieving self-sufficiency—it’s about reconnecting with the land, building resilience, and creating a legacy of sustainability for future generations.
—
Related Articles:
- [Discover The Best Foraging Chickens For Your Homes](https://homesteadingalliance.com/discover-the-best-foraging-chickens-for-your-homes/)
- [Discover The Top White Chicken Breeds For Your Flo](https://homesteadingalliance.com/discover-the-top-white-chicken-breeds-for-your-flo/)
- [Boost Your Websites Ranking With Brown Leghorns Ch](https://homesteadingalliance.com/boost-your-websites-ranking-with-brown-leghorns-ch/)
- [Best Off Grid Solar Systems Your 2024 Power Indepe](https://homesteadingalliance.com/best-off-grid-solar-systems-your-2024-power-indepe/)
- [Affordable Solar Battery Packs Empower Your Energy](https://homesteadingalliance.com/affordable-solar-battery-packs-empower-your-energy/)
This post may contain affiliate links. As an Amazon Associate, we earn from qualifying purchases at no extra cost to you. Read our full disclosure policy.