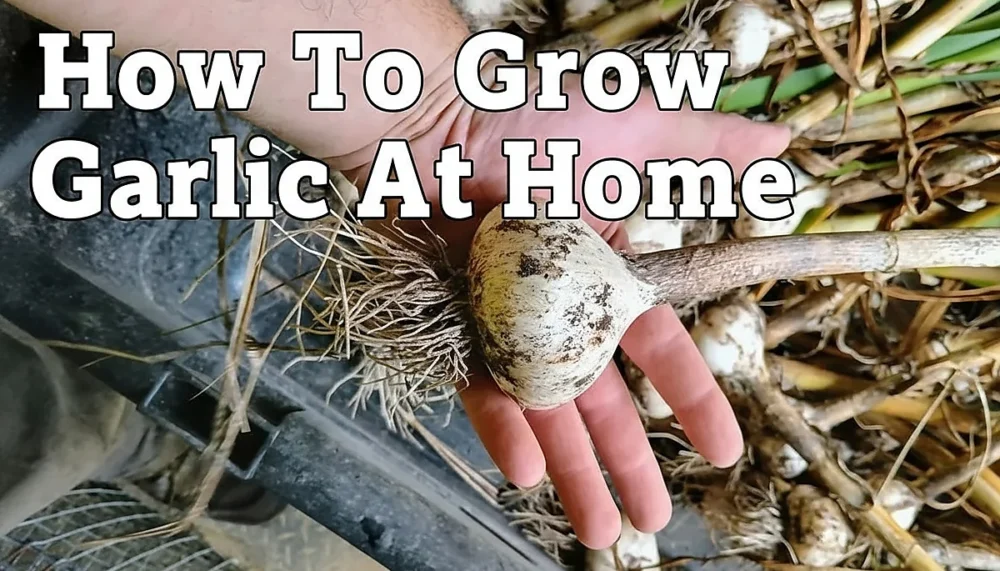
If you’re looking for the perfect entry point into regenerative gardening, growing your own garlic at home should be at the top of your list.
This remarkable bulb practically grows itself once you understand a few key principles, making it ideal for beginners while still offering plenty of depth for experienced growers to master.
Growing garlic sustainably at home offers incredible benefits beyond just having fresh, flavorful bulbs year-round. You’ll build soil health, reduce your dependence on store-bought produce, and create a foundation for expanding your regenerative garden.
Unlike grocery store garlic that’s often treated to prevent sprouting, home-grown garlic develops complex flavors and can be saved as seed for future plantings.
Regenerative agriculture principles applied to garlic focus on building soil biology, increasing organic matter, and creating closed-loop systems that improve your land over time. Rather than depleting resources, regenerative garlic growing actually enhances your soil’s fertility, water-holding capacity, and carbon storage.
In this comprehensive guide, you’ll learn how to select the right garlic varieties for your climate, prepare living soil that feeds your plants naturally, master planting and seasonal care techniques, and harvest bulbs that will store for months.
Most importantly, you’ll discover advanced regenerative methods that transform garlic growing from a simple garden task into a soil-building powerhouse.
Table of Contents
- How to grow garlic at home Understanding Garlic Types and Varieties
- Regenerative Soil Preparation: Building Living Soil
- Planting Garlic: Timing and Techniques
- Companion Planting and Crop Rotation
- Caring for Garlic Throughout the Season
- Organic Pest and Disease Management
- Harvesting at the Perfect Time
- Curing and Storing Garlic for Year-Round Use
- Advanced Regenerative Techniques
- Troubleshooting Common Problems
- Frequently Asked Questions
- Conclusion
How to grow garlic at home Understanding Garlic Types and Varieties
Hardneck vs Softneck Garlic: Which Should You Choose?
The first decision every garlic grower faces is choosing between hardneck and softneck varieties, and your climate zone largely determines the best choice.
Hardneck garlic thrives in cold climates (zones 3-6) where winter temperatures drop below 20°F for extended periods. These varieties require 12-16 weeks of cold exposure below 40°F to form proper bulbs. Hardneck garlic produces scapes (flower stalks) in early summer, which are both edible and beneficial for bulb development when removed. However, hardneck bulbs typically store for only 3-4 months, making them best for fall and winter use.
Softneck garlic performs better in mild winter climates (zones 7-10) where temperatures rarely drop below 10°F. These varieties don’t produce scapes and channel all their energy into bulb formation, resulting in larger bulbs with excellent storage life of 6-12 months. Softneck varieties are your best choice for warm climates and long-term storage needs.
The best hardneck varieties include Music (excellent cold hardiness and strong flavor), German Extra Hardy (reliable performer in harsh climates), and Korean Purple (beautiful purple striping with complex flavor). For softneck varieties, California White offers mild flavor and excellent storage, while Inchelium Red provides larger bulbs with rich, robust taste.
Temperature requirements are specific: hardneck varieties need soil temperatures below 40°F for 12-16 weeks during winter, while softneck varieties can form bulbs with minimal chilling but perform best with 4-8 weeks of temperatures between 32-50°F.
How to Grow Garlic at Home: Choosing Disease-Free Seed Garlic
Grocery store garlic often fails in home gardens because it’s treated with growth inhibitors to prevent sprouting, may carry diseases, and is typically selected for shipping rather than growing characteristics. Even when untreated garlic does sprout, it’s often poorly adapted to your local growing conditions.
Certified seed garlic from reputable suppliers ensures disease-free planting stock adapted to your region. Local sources often provide varieties tested in your specific climate, while online suppliers offer wider selection and detailed growing information.
When selecting seed garlic, look for large, firm bulbs free from soft spots, mold, or dark discoloration. Nematode damage appears as small brown spots or corky areas on cloves. Choose bulbs with tight, papery outer skins and heavy weight relative to size. The largest cloves from each bulb should be reserved for planting, as they have the best chance of producing large bulbs the following season.
Disease-resistant varieties include many hardneck types naturally adapted to fungal pressure, while softneck varieties often show better resistance to bacterial diseases common in warmer climates.
Regenerative Soil Preparation: Building Living Soil
Why Soil Health Matters for Garlic
Garlic is a heavy feeder that requires rich, well-draining soil with abundant organic matter and active soil biology. Unlike many crops that can tolerate mediocre soil, garlic responds dramatically to soil health improvements, often doubling yields in truly living soil compared to conventional growing methods.
The key lies in soil biology – the complex network of bacteria, fungi, protozoa, and other microorganisms that cycle nutrients and create soil structure. These organisms break down organic matter into plant-available nutrients, form beneficial relationships with garlic roots, and create the aggregated soil structure that provides both good drainage and water retention.
Regenerative practices for garlic yields focus on feeding soil biology rather than just feeding plants directly. This approach creates lasting improvements that benefit not just your garlic crop but your entire garden ecosystem.
Building Soil Organic Matter Naturally
The foundation of regenerative garlic growing is building soil organic matter through natural processes. Begin by adding 3-4 inches of high-quality compost to your planting area in late summer, well before fall planting. This gives soil organisms time to integrate the organic matter and create stable soil structure.
Cover crops planted before garlic provide exceptional soil building benefits.
Oats planted 60 days before garlic create biomass and winter-kill naturally, providing surface mulch.
Forage radish breaks up compacted soil with deep taproots while scavenging nutrients from lower soil layers.
Winter pea fixes nitrogen while adding organic matter, creating perfect conditions for heavy-feeding garlic.
Green manure options include legumes like crimson clover or hairy vetch for nitrogen fixation, while grasses like winter wheat or rye provide carbon-rich organic matter that improves soil structure. The key is balancing nitrogen-rich green materials with carbon-rich brown materials for optimal soil biology.
Composted chicken manure applied at 2-3 tons per acre has been shown to increase garlic yields by 19% while improving soil biology. The slow-release nutrients perfectly match garlic’s growing pattern, with peak availability during spring bulb development.
Soil Testing and pH Requirements
Proper soil testing provides the roadmap for successful garlic growing. Garlic performs best in slightly acidic to neutral soil with pH between 6.0-7.0. Below 6.0, nutrient availability decreases and fungal diseases increase. Above 7.5, micronutrient deficiencies become common.
Garlic’s nutrient requirements are substantial: approximately 120 pounds nitrogen, 160 pounds phosphorus, and 150 pounds potassium per acre for maximum yields. However, these numbers represent total uptake, not fertilizer requirements – much can come from soil biology and organic matter mineralization.
Sulfur requirements of 30 pounds per acre are often overlooked but crucial for flavor development. Garlic’s characteristic pungency comes from sulfur compounds, and sulfur-deficient soil produces bland bulbs regardless of other growing conditions.
When interpreting soil test results for garlic, focus on organic matter percentage (target 3-5%), cation exchange capacity (higher is better for nutrient retention), and biological activity indicators. Soil tests showing low biological activity suggest the need for compost, cover crops, or other organic matter additions before planting.
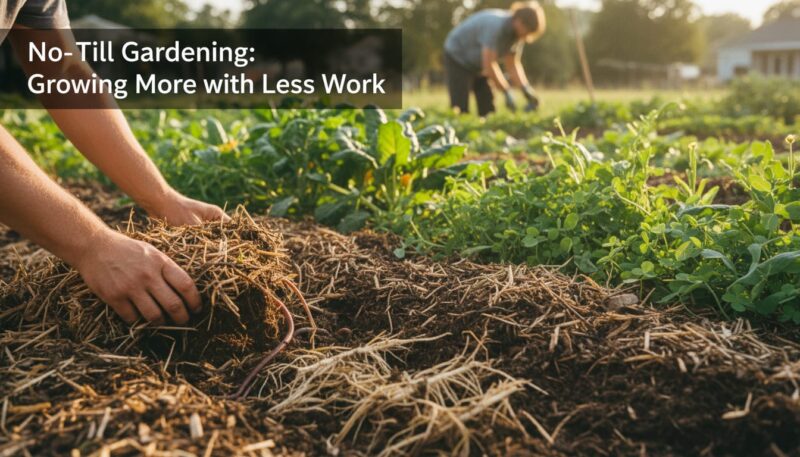
No-Till and Minimum Tillage Methods
No-till garlic production offers significant advantages for soil health and long-term productivity. Conventional tillage destroys soil structure, disrupts beneficial fungal networks, and oxidizes organic matter – exactly the opposite of what regenerative growers want to achieve.
Planting garlic into standing cover crops requires specialized techniques but produces exceptional results. Use a heavy mulch layer to suppress the cover crop, then plant cloves directly through the mulch and dead plant material. This method maintains soil biology, prevents erosion, and provides slow-release nutrients as cover crops decompose.
Reducing soil disturbance protects the soil microbiome that garlic depends on for nutrient cycling. Mycorrhizal fungi, in particular, form beneficial relationships with garlic roots but are easily disrupted by tillage. These fungi extend the root system’s reach and improve drought tolerance while providing nutrients in exchange for plant sugars.
Where some soil disturbance is necessary, use broadforks or other deep-tining tools that fracture compacted layers without mixing soil horizons or destroying biological networks.
Planting Garlic: Timing and Techniques
When to Plant Garlic for Maximum Success
Timing is critical for garlic success, with fall planting providing the best results in most climates. Plant hardneck varieties 4-6 weeks before your first hard frost, when soil temperatures have cooled to 50°F at 4-inch depth. This timing allows roots to establish before winter while preventing excessive top growth that can be damaged by cold.
Softneck varieties in mild climates can be planted later, even into December in zones 8-10, but still benefit from fall planting for maximum bulb development time.
Spring planting is possible but requires cold stratification – storing cloves at 35-40°F for 40 days to simulate winter conditions. Spring-planted garlic rarely produces bulbs as large as fall-planted crops because the growing season is shortened.
Regional planting dates vary significantly: zones 3-4 plant in mid-September, zones 5-6 plant in October, zones 7-8 plant in November, and zones 9-10 can plant through December. Local extension services provide specific recommendations for your microclimate.
Step-by-Step Planting Instructions

Break bulbs into individual cloves no more than 7 days before planting to prevent cloves from drying out. Some growers prefer breaking bulbs just hours before planting for maximum viability.
Pre-planting soaks in liquid seaweed or fish emulsion for 24 hours can improve germination rates and provide early nutrition. This technique is particularly valuable for marginal cloves or when growing conditions are challenging.
Planting depth varies by climate: 1-2 inches deep in warm climates (zones 8-10) and 3-4 inches deep in cold climates (zones 3-6). Deeper planting in cold areas provides freeze protection, while shallower planting in warm areas prevents bulb rot.
Standard spacing places cloves 4-6 inches apart in rows 12-24 inches apart, but alternative spacing of 6-8 inches between cloves produces notably larger bulbs by reducing competition. This wider spacing is particularly valuable when growing for storage or seed stock.

Always plant cloves pointed end up with the root plate (basal plate) facing down. Upside-down ploves can still grow but waste energy correcting their orientation, resulting in smaller bulbs.
Regenerative Mulching Practices

Heavy organic mulch is the cornerstone of regenerative garlic growing, providing multiple benefits that synthetic inputs cannot match. Apply 4-8 inches of organic mulch immediately after planting, creating a protective layer that moderates soil temperature, conserves moisture, and feeds soil biology throughout the growing season.
The best mulch types include straw (wheat, oat, or barley), shredded leaves, and grass clippings. Straw provides excellent insulation and slowly breaks down to feed soil organisms. Shredded leaves create dense mats that suppress weeds while adding diverse organic compounds. Fresh grass clippings should be applied in thin layers to prevent anaerobic conditions.
Mulch benefits extend far beyond simple weed suppression. As mulch decomposes, it feeds the soil biology that cycles nutrients for garlic uptake. The mulch layer creates habitat for beneficial insects, moderates soil temperature swings, and maintains soil moisture during dry periods.
Growing your own oat mulch in place involves planting oats 60 days before garlic, allowing them to reach 12-18 inches tall, then winter-killing naturally to provide perfect mulch coverage. This technique eliminates the need to source and transport mulch materials while building soil organic matter.
The concept of “soil armor” recognizes that soil should never be left bare in regenerative systems. Year-round mulch coverage protects soil from erosion, maintains biological activity, and continues building organic matter even when crops aren’t actively growing.
Planting in Containers and Raised Beds
Container growing requires minimum 8-inch depth for proper bulb development, with 12-inch depth preferred for largest bulbs. Choose containers with excellent drainage – garlic cannot tolerate waterlogged conditions.
Soil mix for containers should combine equal parts high-quality compost, aged manure, and coarse sand or perlite for drainage. Avoid potting mixes high in peat moss, which can become hydrophobic and difficult to re-wet.
Wide bed spacing in 4-foot beds allows 6-inch spacing between cloves in all directions, maximizing growing space while providing easy access for maintenance. This intensive spacing works well in raised beds where soil conditions can be carefully controlled.
Companion Planting and Crop Rotation
Best Companion Plants for Garlic
Strategic companion planting enhances garlic growing through pest deterrence, improved soil health, and efficient space utilization. Brassicas including cabbage, kale, broccoli, and radishes make excellent companions because garlic’s sulfur compounds help deter cabbage worms and aphids while brassica root exudates may help suppress soil-borne diseases.
Tomatoes, carrots, and roses benefit from garlic’s natural pest-repelling properties, while strawberries and garlic create mutually beneficial relationships that improve growth and flavor of both crops.
Scientific evidence supports companion planting benefits through allelopathy (chemical interactions between plants), habitat creation for beneficial insects, and improved resource utilization. Garlic’s shallow roots complement deep-rooted companions, while its pest-deterrent properties protect vulnerable crops during critical growth periods.
Flowers planted near garlic beds attract beneficial insects that control pests and pollinate other garden crops. Marigolds provide season-long pest deterrence, while yarrow attracts predatory insects and accumulates nutrients in its roots that benefit nearby plants.
What NOT to Plant with Garlic
Avoid planting garlic near beans and peas because garlic’s allelopathic compounds can interfere with nitrogen fixation by rhizobia bacteria. This interaction reduces the nitrogen available to both crops and can stunt growth.
Other allium family members including onions, leeks, and chives compete for the same nutrients and soil space while sharing susceptibility to similar pests and diseases. Grouping alliums together concentrates pest populations and increases disease pressure.
Asparagus, sage, and parsley have been observed to grow poorly near garlic, possibly due to allelopathic interactions or competition for specific nutrients.
Crop Rotation for Disease Prevention
Implementing a 3-4 year rotation cycle for the allium family prevents the buildup of soil-borne diseases like white rot, which can persist in soil for decades once established. Rotate garlic with crops from different plant families that don’t share disease susceptibilities.
Following garlic with cover crops like Lady Phacelia provides soil-building benefits while breaking pest and disease cycles. Phacelia’s deep taproot brings up nutrients while its flowers attract beneficial insects that control pests in subsequent crops.
Excellent rotation crops include corn (removes excess nitrogen that could cause disease problems), beans (fixes nitrogen for following crops), and lettuce (light feeder that utilizes residual soil fertility without depleting nutrients needed for the next garlic crop).
Caring for Garlic Throughout the Season
Spring Care and Fertilization

As soil temperatures warm in spring and garlic shoots reach 4-6 inches tall, side-dress plants with compost or other organic fertilizers. This timing coincides with rapid bulb development and ensures nutrients are available when plants need them most.
Nitrogen application timing follows the 1/3 at planting, 2/3 in spring rule for optimal results. Apply nitrogen sources every 2-3 weeks during active spring growth, stopping when scapes appear to prevent excessive foliage at the expense of bulb development.
Organic nitrogen sources include blood meal (quick-release), fish emulsion (balanced nutrients plus microorganisms), and seaweed extract (slow-release with trace minerals). Each provides different benefits: blood meal for rapid spring growth, fish emulsion for sustained feeding, and seaweed for stress resistance and flavor development.
Over-fertilization, particularly with nitrogen, creates lush foliage but small bulbs while increasing susceptibility to fungal diseases. The goal is steady, moderate growth rather than rapid, succulent growth that attracts pests and diseases.
Removing mulch in spring is optional and depends on soil conditions. In heavy clay soils, removing mulch helps soil warm faster, while in sandy soils, maintaining mulch coverage prevents moisture loss and continues feeding soil biology.
Watering Requirements
Garlic requires consistent moisture throughout the growing season, with approximately 1 inch of water weekly from irrigation or rainfall. Spring moisture is particularly critical as this is when bulbs are forming and sizing.
Consistent moisture prevents stress that can cause bulbs to mature prematurely or fail to size properly. However, avoid overwatering, which can lead to fungal diseases and bulb rot. The goal is evenly moist but never waterlogged soil.
Stop watering 2 weeks before expected harvest to allow bulbs to mature properly and develop the papery skin necessary for storage. Late-season moisture can delay maturity and reduce storage life.
Soaker hoses or drip irrigation provide ideal water delivery by keeping moisture off foliage (reducing disease pressure) while delivering water directly to the root zone. Overhead sprinklers should be used only early in the day to allow foliage to dry before evening.
Weed Management the Regenerative Way

Garlic cannot compete effectively with weeds due to its narrow leaves and relatively slow early growth. Weeds that emerge through mulch must be managed quickly before they establish competitive root systems.
Thick mulch layers provide the best weed suppression while building soil health. Maintain 4-6 inches of organic mulch throughout the growing season, adding fresh material as existing mulch decomposes.
Hand weeding is preferable to cultivation because garlic has shallow roots that are easily damaged. When cultivation is necessary, work very shallowly (1-2 inches deep) and only when soil is at proper moisture – not too wet or too dry.
Building up grass clippings throughout the growing season provides ongoing weed suppression while slowly releasing nutrients. Apply thin layers (1-2 inches) of fresh clippings monthly to prevent matting and anaerobic conditions.
Managing Scapes for Larger Bulbs
Hardneck garlic produces scapes (flower stalks) in early to mid-June when they begin to curl or form complete loops. Removing scapes directs the plant’s energy into bulb development rather than seed production, resulting in 20-30% larger bulbs.
Proper removal technique involves pulling scapes rather than cutting to prevent leaving stub that could harbor disease. Pull scapes when they’re tender and easily snapped – usually when they’ve made one complete curl or spiral.
Timing is important: removing scapes too early reduces the benefit, while removing them too late (after they’ve straightened) provides minimal improvement in bulb size.
Scapes are delicious and versatile in cooking. Use them fresh in stir-fries, make scape pesto, pickle them for preservation, or use as a mild garlic flavoring in any dish. Harvesting scapes essentially gives you two crops from one planting.
Organic Pest and Disease Management
Common Garlic Pests and Prevention
Onion thrips are tiny insects that feed on garlic leaves, causing silver streaks and reduced photosynthesis. They’re most problematic during hot, dry weather and can be managed through consistent moisture and beneficial insect habitat.
Bulb mites attack stored garlic and can also infest plants in the field. Prevention focuses on proper soil drainage, crop rotation, and avoiding wounded bulbs that provide entry points.
Leek moths are becoming more widespread and can cause significant damage to garlic crops. Their larvae bore into leaves and bulbs, making organic control challenging once established.
Garlic itself acts as a natural pest repellent for many garden crops, making it valuable for integrated pest management throughout the garden. Its sulfur compounds deter aphids, cabbage worms, and many other soft-bodied insects.
Row covers provide physical protection during vulnerable growth periods but must be removed once scapes emerge to allow proper development. Use lightweight fabrics that allow air circulation while excluding pests.
Beneficial insects including ladybugs, lacewings, and predatory mites help control pest populations naturally. Provide habitat through diverse plantings and avoid broad-spectrum insecticides that harm beneficial species.
Fungal Diseases and Organic Solutions
White rot is the most serious garlic disease, capable of destroying entire crops and persisting in soil for decades. It appears as white, fluffy growth at the base of bulbs and yellowing foliage. Prevention through crop rotation and avoiding infected soil is the only effective management.
Purple blotch causes purple spots on leaves and can reduce bulb quality. It’s encouraged by high humidity and poor air circulation. Manage through proper spacing, avoiding overhead irrigation, and removing affected plant debris.
Downy mildew appears as yellow streaks on leaves that later turn purple. It’s most problematic during cool, moist conditions in spring. Copper-based fungicides can provide organic control when applied preventively.
Brassica decomposition products have antifungal properties that can help suppress soil-borne diseases. Incorporating chopped brassica residues into soil before planting may reduce disease pressure, though more research is needed on this technique.
Hot water treatment for seed cloves involves immersing them in 110-112°F water for 10-12 minutes to kill disease organisms without damaging viability. This treatment is particularly valuable for saved seed stock or when disease pressure is high.
Corn meal amendments to soil may help suppress fungal diseases through competitive exclusion by beneficial microorganisms. Apply 5-10 pounds per 1000 square feet in spring when soil begins to warm.
Integrated Pest Management (IPM) for Garlic
Cultural practices form the foundation of IPM for garlic. Proper sanitation involves removing plant debris that could harbor pests and diseases, while crop rotation breaks pest life cycles and reduces disease pressure.
Organic sprays should be used judiciously and only when pest populations exceed economic thresholds. Neem oil provides broad-spectrum control of soft-bodied insects and some fungal diseases. Bt (Bacillus thuringiensis) targets caterpillar pests specifically without harming beneficial insects. Copper fungicides provide preventive disease control but should be used sparingly to avoid copper buildup in soil.
Soil solarization using clear plastic to heat soil to lethal temperatures can reduce soil-borne disease pressure but requires specific conditions and timing to be effective. This technique works best in hot climates during summer months.
Winter flooding, where feasible, can help control some soil-borne pests and diseases by creating anaerobic conditions that are lethal to many pathogens while being tolerated by garlic bulbs in dormancy.
Harvesting at the Perfect Time
Signs Your Garlic is Ready to Harvest
Proper harvest timing is crucial for maximizing both bulb size and storage life. The classic indicator is when the bottom 3-4 leaves have turned yellow or brown while the top leaves remain green. This typically occurs 6-8 months after planting, depending on variety and growing conditions.
Test harvesting involves carefully digging one bulb to check development. Properly mature bulbs show distinct clove formation with papery wrappers around individual cloves and the entire bulb. Under-mature bulbs may have poor clove differentiation or loose, wet wrappers.
Regional harvest windows vary significantly with climate: northern areas typically harvest in July-August, while southern regions may harvest as early as May. The key is monitoring individual plants rather than relying solely on calendar dates.
Hardneck varieties often mature 2-3 weeks earlier than softneck varieties planted at the same time, so keep detailed records for planning future harvests.
Proper Harvesting Technique

Use a digging fork rather than a shovel to loosen soil around bulbs without cutting roots or damaging bulbs. Work from the side of the row to avoid stabbing directly into bulbs.
Harvest 3-5 days after the last rain for optimal curing conditions. Bulbs harvested from saturated soil take longer to cure and have higher risk of rot during storage.
Avoid sun scald damage by harvesting early in the morning or on cloudy days. Direct sunlight on freshly harvested bulbs can cause skin burning that reduces storage life.
Handle bulbs carefully throughout the harvesting process. Bruised or damaged bulbs should be used fresh rather than stored, as damaged areas provide entry points for decay organisms.
Shake off excess soil but don’t wash bulbs – soil residues help protect bulbs during curing. Leave roots and tops attached during initial curing to allow nutrients to continue moving into bulbs.
Curing and Storing Garlic for Year-Round Use
The Curing Process Explained

Curing transforms fresh garlic into the shelf-stable product familiar to most gardeners. During curing, outer skin layers dry to create protective barriers while interior moisture levels decrease to prevent sprouting and decay.
Ideal curing conditions include warm temperatures (80-85°F), low humidity (60-70%), excellent air circulation, and protection from direct sunlight. Attics, covered porches, or well-ventilated outbuildings often provide perfect conditions.
Curing duration typically requires 2-4 weeks until outer skins become papery and crackle when touched. Properly cured garlic feels firm and solid without soft spots or moisture when squeezed gently.
Leaving tops attached during curing allows nutrients stored in leaves to move into bulbs, improving both size and storage quality. Tops can be braided for softneck varieties or bundled for hardneck types during curing.
Signs of complete curing include papery outer skins, dried necks that can be easily trimmed, and firm bulbs that rattle slightly when shaken due to cloves shrinking away from outer wrappers.
Long-Term Storage Methods
After curing, trim stems to 1-2 inches above bulbs for most storage methods. Leave longer stems only if braiding softneck varieties for decorative storage.
Ideal storage temperatures range from 35-50°F with low humidity (60-70%) and good air circulation. Basements, root cellars, or refrigerator crisper drawers often provide suitable conditions.
Storage containers should allow air circulation while protecting bulbs from light. Mesh bags, brown paper bags with holes punched for ventilation, or wooden crates with slatted sides work well. Avoid plastic bags or airtight containers that trap moisture.
Hardneck varieties typically store 3-4 months under ideal conditions, while softneck varieties can last 6-12 months. Monitor stored garlic monthly and remove any bulbs showing signs of sprouting or decay.
Braiding softneck garlic provides both functional storage and attractive displays. Braid while stems are still pliable from curing, creating tight braids that hold bulbs securely while allowing air circulation.
Saving Seed Garlic for Next Year
Select the largest, healthiest bulbs from your harvest for replanting. These bulbs have proven their adaptation to your specific growing conditions and will likely perform even better in subsequent years.
Natural selection for better yields occurs when you consistently save seed from top-performing plants. Over time, this process develops locally adapted strains that outperform generic varieties.
Store seed garlic under the same conditions as eating garlic but check more frequently for sprouting. Plant sprouted cloves immediately if soil conditions allow, or hold in refrigerated storage until proper planting time.
Keep detailed records of variety performance, harvest dates, and storage characteristics to guide future variety selection and planting decisions.
Advanced Regenerative Techniques
Building Soil Carbon with Cover Crops
Planting cover crops immediately after garlic harvest maximizes photosynthesis and carbon sequestration during the growing season’s remainder. Fast-growing crops like buckwheat, oats, or forage radish can establish quickly and provide significant biomass before winter.
Cover crop sequences in fallow beds involve planting multiple species in succession to maintain living roots and active photosynthesis year-round. This technique maximizes carbon capture while building soil biology through diverse root exudates.
The key to maximizing photosynthesis is maintaining leaf coverage throughout the growing season. Even short gaps between crops represent missed opportunities for carbon capture and soil building.
Different cover crop species contribute unique benefits: legumes fix nitrogen, grasses provide carbon-rich residues, brassicas scavenge nutrients and suppress diseases, and deep-rooted species bring up minerals from subsoil layers.
Enhancing Soil Microbiology
Mulch feeds soil biology year-round by providing steady inputs of organic matter that decompose gradually. This consistent feeding maintains active microbial populations that cycle nutrients and improve soil structure continuously.
Mycorrhizal fungi form particularly important relationships with garlic, extending root reach and improving nutrient uptake efficiency. These fungi are disrupted by tillage and fungicides but thrive under organic mulch systems.
Creating habitat for earthworms, bacteria, and protozoa involves providing food sources (organic matter), maintaining soil moisture, and avoiding disruption through tillage or chemical inputs. Healthy soils teem with biological activity visible through earthworm castings, fungal networks, and rich, earthy smells.
Soil biology indicators include earthworm populations (target 10+ per square foot), fungal networks visible in mulch layers, and rapid decomposition of organic matter. These signs indicate active, healthy soil ecosystems.
Reducing Off-Farm Inputs
Growing your own mulch and fertility materials reduces costs while creating closed-loop nutrient cycling. Dedicated biomass crops like comfrey, Jerusalem artichoke, or perennial grasses can provide ongoing organic matter inputs.
Using green manures instead of purchased compost involves growing nitrogen-fixing crops like crimson clover or hairy vetch, then incorporating them before planting garlic. This technique provides equivalent nutrition while building soil biology.
Closed-loop nutrient cycling captures and recycles all organic materials within the farming system. Crop residues, kitchen scraps, and even human waste (properly composted) can contribute to soil fertility without external inputs.
On-farm compost systems utilizing crop residues, kitchen scraps, and carbon materials create high-quality soil amendments while reducing waste and input costs.
Continuous Soil Improvement
Never leaving soil bare protects against erosion while maintaining biological activity year-round. Living mulches, cover crops, or organic mulches should cover soil throughout all seasons.
Active carbon serves as an indicator of soil health, measuring the readily available organic compounds that feed soil biology. Increasing active carbon levels correlate with improved nutrient cycling and plant health.
Monitoring earthworm populations provides a simple indicator of soil biological activity. Healthy soils support 10-20 earthworms per square foot, with their castings indicating active organic matter processing.
Annual soil testing tracks improvements in organic matter, biological activity, and nutrient cycling efficiency. Look for increasing organic matter percentages, stable pH, and improving nutrient levels over time.
Troubleshooting Common Problems
Small Bulbs at Harvest
Small bulbs typically result from insufficient fertility, particularly nitrogen deficiency during spring bulb development. Side-dress with compost or organic fertilizer when shoots reach 4-6 inches tall.
Poor drainage creates anaerobic conditions that limit root development and nutrient uptake. Improve drainage through raised beds, organic matter additions, or installing drainage tiles in problem areas.
Overcrowding from insufficient spacing forces plants to compete for nutrients and space. Increase spacing to 6-8 inches between cloves for larger bulbs, particularly when growing for seed stock.
Late planting reduces the growing season available for bulb development. Plant hardneck varieties 6-8 weeks before first frost and softneck varieties by early December in mild climates.
Failure to remove scapes from hardneck varieties diverts energy into seed production rather than bulb development. Remove scapes when they begin to curl for 20-30% larger bulbs.
Poor Emergence or Winter Kill
Planting too shallow in cold climates exposes cloves to freeze damage. Plant 3-4 inches deep in zones 3-6 and provide heavy mulch coverage for insulation.
Insufficient mulch protection allows temperature fluctuations that can kill or damage cloves. Apply 6-8 inches of organic mulch after planting and maintain coverage throughout winter.
Planting too early in fall can cause excessive growth that’s vulnerable to winter damage. Time planting so shoots emerge but don’t exceed 4-6 inches before winter dormancy.
Poor quality seed stock may have low viability or disease issues that prevent emergence. Source certified disease-free seed garlic from reputable suppliers adapted to your growing region.
Rotting or Disease Issues
Poor drainage creates conditions favoring fungal and bacterial diseases. Improve soil drainage through organic matter, raised beds, or subsurface drainage before planting.
Overwatering, particularly late in the season, can cause bulb rot and delayed maturity. Reduce irrigation as harvest approaches and avoid watering after scapes appear.
Planting too deep in heavy soils can cause poor emergence and increased disease pressure. Adjust planting depth based on soil type and drainage characteristics.
Lack of crop rotation allows disease pressure to build in soil over time. Rotate garlic with non-allium crops for 3-4 years to break disease cycles.
Contaminated mulch or compost can introduce disease organisms. Source organic materials from reliable suppliers or compost them thoroughly before application.
Frequently Asked Questions
Can I grow garlic from grocery store bulbs?
While possible, grocery store garlic often fails because it’s treated to prevent sprouting and may carry diseases. Success rates are much higher with certified seed garlic adapted to your region.
How long does garlic take to grow?
Garlic typically requires 6-8 months from planting to harvest. Fall-planted garlic harvests in mid-summer, while spring-planted garlic may not be ready until late summer or fall.
Do I need to fertilize garlic?
Garlic is a heavy feeder that responds well to fertile soil. Compost, aged manure, or organic fertilizers applied at planting and again in spring provide optimal nutrition for large bulbs.
Can I grow garlic in the same spot every year?
Continuous garlic growing in the same location increases disease pressure and depletes specific nutrients. Rotate with other crop families for 3-4 years between garlic crops.
What’s the best mulch for garlic?
Straw, shredded leaves, and grass clippings all work well. The key is using organic materials that suppress weeds while slowly decomposing to feed soil biology.
How do I know if my garlic has diseases?
Common symptoms include yellowing leaves, stunted growth, white fuzzy growth on bulbs (white rot), or purple spots on foliage (purple blotch). Remove affected plants immediately and avoid replanting in infected areas.
Can I harvest garlic early for green garlic?
Yes! Green garlic can be harvested anytime after shoots are 6-8 inches tall. It has a mild garlic flavor and can be used like green onions in cooking.
Why are my garlic bulbs not forming cloves?
Poor clove formation usually results from insufficient cold exposure (particularly in hardneck types), poor nutrition, or stress from disease or pests. Ensure proper variety selection for your climate zone.
Conclusion
Regenerative garlic growing transforms a simple garden crop into a powerful tool for soil building and sustainable food production. By focusing on soil health, biological diversity, and closed-loop systems, you create conditions that benefit not just your garlic harvest but your entire garden ecosystem.
The principles covered in this guide – building soil organic matter, maintaining living soil coverage, feeding soil biology, and reducing external inputs – apply far beyond garlic growing. Master these techniques with garlic, and you’ll have the foundation for expanding regenerative practices throughout your garden.
Start small with a dedicated garlic bed, focus on soil health improvements, and gradually scale up as you gain experience. Each season provides opportunities to observe, learn, and refine your techniques while building soil health that will benefit crops for years to come.
Remember to save your best garlic bulbs for next year’s seed stock. This practice not only saves money but develops locally adapted varieties that perform better each season. Over time, you’ll develop garlic strains uniquely suited to your specific growing conditions and management style.
Garlic serves as the perfect gateway to regenerative gardening because it’s forgiving, stores well, provides clear feedback on soil health, and offers multiple harvests (scapes and bulbs) from a single planting. Success with garlic builds confidence and skills that translate directly to other regenerative growing practices.
The investment in soil health you make while growing garlic pays dividends across your entire garden, creating fertile, biologically active soil that supports abundant plant growth while sequestering carbon and building resilience against drought and disease. Start your regenerative journey with garlic, and discover how working with natural systems creates better results with less effort over time.