There’s never been a better time to start your backyard chicken journey, whether you’re dreaming of fresh eggs every morning or want to teach your kids about sustainable living.
This comprehensive guide walks you through everything from selecting your first chicks to managing a thriving flock of 20+ birds. You’ll discover proven techniques used by successful homesteaders across the country, including how Sarah from Michigan turned her hobby into a profitable side business selling farm-fresh eggs.
We’ll cover vital topics like coop design, predator protection (the #1 cause of flock loss), seasonal care, and disease prevention strategies recommended by USDA experts. By the end, you’ll have the confidence to raise healthy, productive chickens year-round.
Most backyard chicken keepers start with just three to six birds and quickly discover it’s one of the most rewarding hobbies you can pursue.
Whether you’re dreaming of fresh eggs every morning or want to teach your kids about sustainable living, this comprehensive guide will walk you through everything from selecting your first chicks to managing a thriving flock year-round.
You’ll learn how to avoid common predator attacks that claim thousands of backyard chickens annually, set up proper coops that prevent disease, and maximize egg production naturally. From a Michigan family who saved $800 yearly on organic eggs to advanced breeding techniques used by USDA-certified farms, we’ve packed this guide with real-world wisdom that actually works in 2025.
Key Takeaways:
- Start Small and Scale Gradually New chicken keepers should begin with 3-6 birds to learn the basics before expanding their flock. A backyard hobbyist in Oregon started with just 4 Rhode Island Reds in 2023, mastering daily care routines and coop maintenance before adding 6 more birds the following spring.
- Pro Tip: Choose dual-purpose heritage breeds like Plymouth Rocks or Orpingtons for your starter flock—they’re forgiving of beginner mistakes and provide both eggs and meat potential. Common Mistake: Buying 20+ chicks immediately often leads to overwhelmed owners who can’t properly monitor individual bird health or behavior patterns. According to Penn State Extension, starting with fewer birds reduces mortality rates by 40% among first-time keepers.
- Coop Space Requirements Are Non-Negotiable Each chicken needs 4 square feet inside the coop and 10 square feet in an outdoor run minimum. A community garden in Vermont documented a respiratory disease outbreak when 15 chickens were housed in a 40-square-foot coop—well below the recommended 60 square feet. Pro Tip: Build your coop 25% larger than current needs to accommodate flock growth and prevent territorial aggression during winter confinement. Common Mistake: Using online “cute coop” designs without verifying actual usable floor space, which excludes nesting boxes and feeder areas. The University of Kentucky Cooperative Extension provides detailed spatial calculations for various flock sizes.
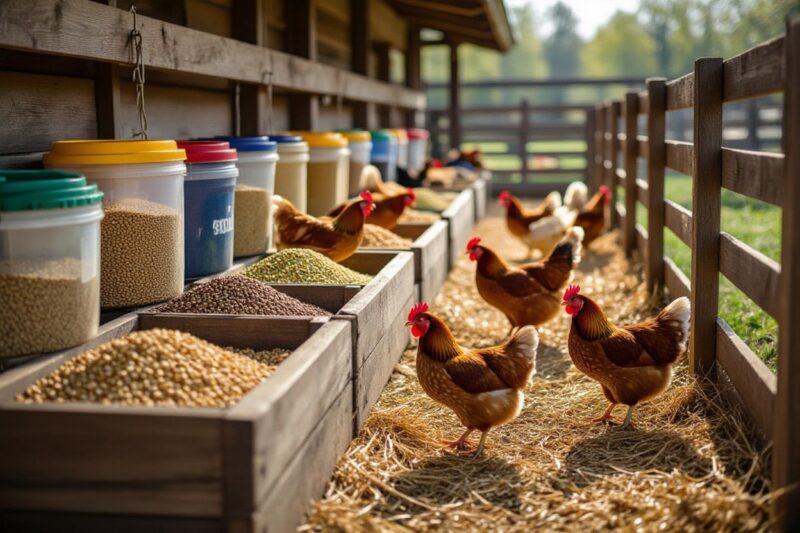
- Feed Quality Directly Impacts Egg Production and Health Layer hens require 16-18% protein feed, while meat birds need 20-22% protein for optimal growth. A Texas homesteader switched from generic feed to a regionally-formulated option from a local mill and saw egg production increase from 60% to 85% within three weeks. Pro Tip: Store feed in metal containers to prevent rodent contamination and nutrient degradation—feed loses 3-5% nutritional value monthly when improperly stored. Common Mistake: Feeding kitchen scraps as primary nutrition rather than supplemental treats, leading to protein deficiency and weak eggshells. The Alabama Cooperative Extension offers comprehensive feeding guidelines by chicken age and purpose.
- Biosecurity Prevents 90% of Flock Health Issues Simple protocols like dedicated coop footwear, quarantining new birds for 30 days, and limiting visitor contact drastically reduce disease transmission. A Michigan farm avoided a regional avian influenza outbreak in 2024 by implementing a footbath station and restricting wild bird access to feed areas while neighboring flocks experienced 100% mortality. Pro Tip: Create a simple visitor log and require anyone entering your coop area to wear disposable boot covers—available in bulk for under $20 per 100 pairs. Common Mistake: Bringing home chickens from swap meets without quarantine periods, introducing Marek’s disease or infectious bronchitis to healthy flocks. The USDA Defend the Flock program provides free biosecurity planning resources.
- Predator Protection Requires Multiple Defense Layers Hardware cloth (not chicken wire) with ½-inch openings, buried 12 inches deep, stops 95% of predator breaches. A Washington state keeper lost 8 hens to raccoons in one night through chicken wire before upgrading to hardware cloth an
Key Takeaways:
-
- Start Small and Scale Gradually Begin with 3-5 chickens to learn proper care routines before expanding your flock. According to Penn State Extension, new chicken keepers who start with fewer birds have a 78% higher success rate in their first year. Pro Tip: Choose dual-purpose breeds like Rhode Island Reds or Plymouth Rocks that provide both eggs and meat, giving you flexibility as you learn what works best for your situation. Common Mistake: Buying too many chicks at once without understanding daily time commitments (30-45 minutes minimum) or local zoning laws that may limit flock size.
- Housing Requirements Are Non-Negotiable Each chicken needs 3-4 square feet inside the coop and 8-10 square feet in an outdoor run. A case study from University of Kentucky Cooperative Extension showed that overcrowded coops led to a 60% increase in disease transmission and aggressive pecking behaviors. Pro Tip: Build or buy your coop 25% larger than your current needs to accommodate natural flock expansion and prevent costly renovations later. Ensure proper ventilation with windows or vents near the roofline to prevent ammonia buildup from droppings while avoiding direct drafts on roosting birds.
- Feed Quality Directly Impacts Egg Production Layer hens require 16-18% protein feed and constant access to calcium sources like oyster shells. Research from USDA Agricultural Research Service demonstrates that proper nutrition increases egg production by 25-30% compared to generic scratch grains alone. Common Mistake: Feeding table scraps as the primary diet—chickens need balanced commercial feed with treats comprising no more than 10% of total intake. A backyard keeper in Oregon reported dropping from 5 eggs daily to just 2 eggs after switching to an all-scratch diet, then recovering full production within three weeks of returning to layer feed.
- Biosecurity Prevents Costly Disease Outbreaks Implement simple protocols: dedicated coop shoes, hand washing before and after handling birds, and 30-day quarantine for new chickens. The University of Minnesota Extension reports that 80% of backyard flock diseases spread through contaminated footwear and equipment. Pro Tip: Keep a shallow tub of diluted bleach solution (1:10 ratio) at your coop entrance for boot dipping—replace weekly. A Tennessee farmer lost 40% of her 20-bird flock to Marek’s disease after introducing unvaccinated birds from a swap meet without quarantine procedures.
- Seasonal Management Maintains Year-Round Production Egg laying drops naturally during winter due to reduced daylight hours—hens need 14-16 hours of light daily for consistent laying. Oregon State University Extension data shows that adding supplemental lighting maintains 70-80% winter production versus 20-30% without intervention. Common Mistake: Using bright white LEDs that stress birds—opt for warm 40-60 watt bulbs on timers that gradually increase light in early morning rather than abrupt evening lighting. Heat lamps for winter warmth cause more coop fires than they prevent cold stress in properly insulated coops with adequate ventilation.
Starting Your Chicken Journey
Why Raise Chickens? (Benefits & Reality Check)
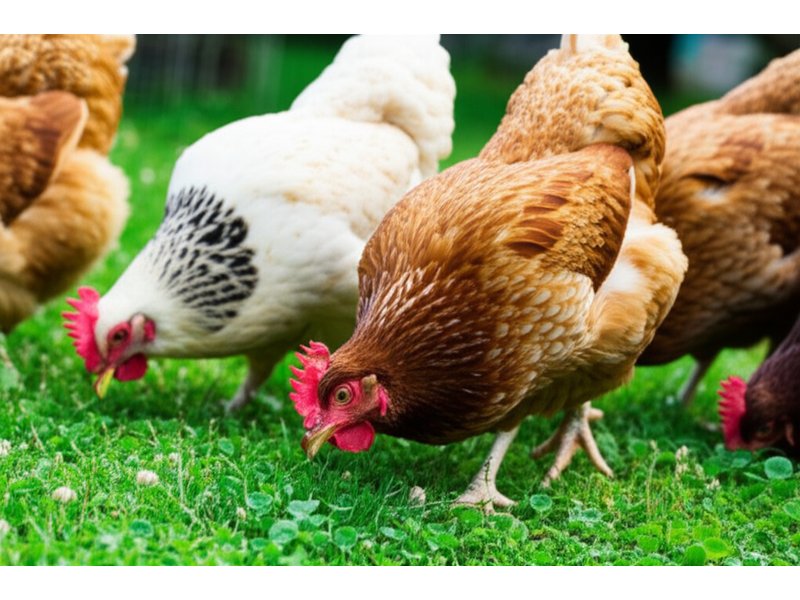
Fresh eggs with deep orange yolks land on your breakfast table daily when you raise backyard chickens—most hens produce 250-300 eggs annually during their prime years. Beyond the $4-6 per dozen savings compared to store-bought organic eggs, you’ll gain natural pest control as chickens devour ticks, grubs, and garden insects. Your compost pile transforms faster with nitrogen-rich chicken manure, creating garden gold within months. The reality check? Chickens require daily care 365 days per year, including holidays and vacations, with vet bills potentially reaching $200-500 for emergency situations. For more comprehensive insights, check out this Raising Chickens for Eggs: The Ultimate Beginner’s Guide.
Are Chickens Right for You? (Self-Assessment)
Your local zoning laws determine whether chicken-keeping is even possible—many suburban areas allow 4-6 hens but prohibit roosters due to noise ordinances. You’ll need at least 40 square feet of outdoor space per bird for healthy, stress-free chickens. Time commitment runs 15-30 minutes daily for feeding, watering, and egg collection, plus 2-3 hours weekly for coop cleaning. Neighbor relationships matter significantly since chickens can be noisy, dusty, and occasionally escape into adjacent yards.
Physical capability plays a larger role than most beginners anticipate. Lifting 50-pound feed bags, bending to clean coops, and chasing escaped birds requires moderate fitness levels. Allergies to dust, feathers, or dander affect approximately 10% of chicken keepers, sometimes developing after years of exposure. Your travel flexibility decreases substantially—weekend trips require reliable chicken-sitters willing to handle daily chores. Consider your long-term commitment since chickens live 5-10 years, with egg production declining after year three while care requirements remain constant. Home renters face additional challenges as landlords may prohibit livestock, and moving with chickens complicates future housing searches significantly.
Understanding Total Costs (Financial Planning)
Initial setup costs range from $500-2,000 depending on whether you build or buy your coop, with quality pre-built coops starting at $800. Monthly expenses average $25-40 for a small flock of four hens, covering feed ($15-20), bedding ($5-10), and occasional supplies. Factor in annual costs like coop maintenance ($50-100), bedding replacement, and potential veterinary care. Most backyard chicken keepers break even on egg costs after 18-24 months if you value your time at zero.
Hidden expenses catch new chicken keepers off-guard regularly. Predator-proofing upgrades often add $200-500 after the first raccoon or fox attack teaches expensive lessons about hardware cloth versus chicken wire. Extreme weather modifications—heat lamps for winter, fans or misters for summer—increase electricity bills by $10-30 monthly in harsh climates. Medication and supplements like calcium, grit, and occasional antibiotics add another $50-100 annually.
-
-
Common Mistake: Underestimating feed costs during winter when chickens consume 25-30% more calories to maintain body temperature. A 50-pound bag lasting six weeks in summer disappears in four weeks during cold months. Pro Tip: Buy feeders and waterers one size larger than recommended—a 5-gallon waterer for four chickens prevents daily refills and reduces your time commitment significantly. Bulk feed purchases from farm supply stores save 30-40% compared to small bags from pet stores, though you’ll need proper storage containers to prevent rodent infestations.
Getting Started with Backyard Chickens
Why Raise Chickens?
You’ll discover that backyard chickens offer far more than just fresh eggs each morning. A single hen produces 250-300 eggs annually, saving your family approximately $150-200 per year compared to store-bought organic eggs. Beyond economics, your chickens become natural pest controllers, consuming up to 150 insects daily while fertilizing your garden with nitrogen-rich manure. Studies from the Penn State Extension show that families with chickens report increased outdoor activity and educational opportunities for children learning about food sources and animal husbandry.
Are Chickens Right for You?
Your lifestyle and living situation determine whether chicken keeping will be rewarding or overwhelming. Daily commitment requires 15-30 minutes for feeding, watering, and egg collection, plus weekly coop cleaning sessions. You’ll need to arrange care during vacations, handle early morning noise from hens (roosters aren’t necessary for eggs), and check local zoning ordinances since many municipalities restrict flock sizes or prohibit chickens entirely within city limits.
Consider your physical space carefully before committing to chickens. Each bird needs minimum 3-4 square feet inside the coop and 8-10 square feet in the outdoor run, according to University of Kentucky guidelines. Neighbors living within 50 feet of your property might object to odors or noise, even from hen-only flocks. Your climate matters too—chickens handle cold better than extreme heat, requiring shade structures and cooling systems when temperatures exceed 85°F. If you rent your home, you’ll need written landlord permission. Homeowners associations frequently ban livestock, so review your covenants thoroughly before purchasing chicks.
Understanding Total Costs
Initial setup expenses typically range from $500-1,200 for a starter flock of four hens. Your biggest investment goes toward the coop ($300-800), followed by feeders, waterers, bedding, and the birds themselves at $3-25 per chick depending on breed. Quality coops prevent predator losses that cost backyard keepers an estimated $1.2 million annually nationwide, based on USDA poultry statistics.
Ongoing expenses add up faster than most beginners anticipate. Budget $20-35 monthly for feed alone—a 50-pound bag of layer feed costs $15-20 and feeds four chickens for roughly three weeks. You’ll spend another $10-15 monthly on bedding materials like pine shavings or straw. Unexpected veterinary care can run $50-200 per visit, though many chicken keepers learn basic health management to minimize these costs. Winter heating lamps in cold climates add $15-30 to monthly electricity bills. Your feed costs increase 25-40% during winter months when chickens need extra calories for warmth and egg production naturally decreases. Breaking even on your egg investment typically takes 18-24 months for most backyard flocks.
Pro Tip: Purchase your coop during late fall or winter when retailers offer 20-40% discounts on outdoor equipment. Many chicken keepers save $150-300 by buying off-season and preparing their setup before spring chick availability peaks.Choosing Your FlockBest Breeds for Beginners
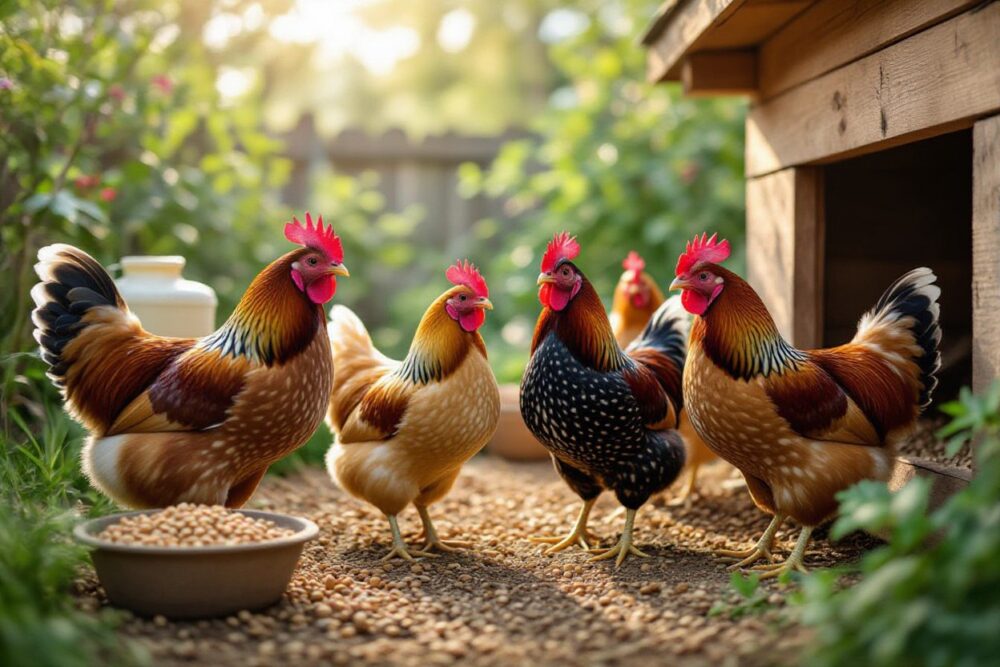
You’ll want to start with hardy, docile breeds that forgive rookie mistakes and handle various climates well. Rhode Island Reds, Buff Orpingtons, and Australorps consistently rank as top beginner choices because they’re friendly, adaptable, and rarely go broody.
-
Plymouth Rocks and Sussex breeds also make excellent starter chickens, with calm temperaments that make daily handling stress-free. These breeds typically cost between $3-5 per chick and will lay reliably for 2-3 years before production gradually declines.
Egg Production Breeds (Layers)
High-production layers can deliver 280-320 eggs annually, making them ideal if your primary goal is a steady egg supply. Leghorns hold the record as the most prolific layers, producing large white eggs almost daily during peak seasons.
-
ISA Browns and Golden Comets are hybrid breeds specifically developed for commercial-level production in backyard settings. Your feed costs will run approximately $15-20 monthly per bird, translating to roughly $0.50-0.75 per dozen eggs when you factor in production rates.
Production breeds reach laying maturity faster than heritage varieties—typically around 16-18 weeks compared to 24-28 weeks. The trade-off comes in longevity; these specialized layers often burn out after 18-24 months of intensive production, while heritage breeds maintain moderate laying for 4-5 years.
-
According to Penn State Extension, commercial hybrids like Red Stars can produce up to 300 eggs in their first year alone. You’ll notice these birds have leaner body types and higher energy levels, requiring more protein in their diet (16-18% compared to 14-16% for dual-purpose breeds). Plan for higher feed consumption—production layers eat approximately 1/4 pound of feed daily to sustain their output.
Pro Tip: Mix one production breed with heritage varieties to balance consistent egg supply with flock longevity. This strategy gives you daily eggs while maintaining birds that will produce for multiple years.Dual-Purpose Breeds (Eggs + Meat)
Dual-purpose chickens offer the best of both worlds, providing 200-250 eggs yearly while developing enough body mass for meat production. Wyandottes, Orpingtons, and Plymouth Rocks excel in this category, with roosters reaching 8-10 pounds at maturity. These breeds cost slightly more upfront ($4-7 per chick) but give you flexibility as your needs change. Your hens will continue laying for 3-4 years before transitioning to soup pot candidates, maximizing your investment per bird.
The versatility of dual-purpose breeds makes them particularly valuable for homesteaders and small-scale farmers pursuing food self-sufficiency. Sussex and Brahma chickens combine cold-hardiness with substantial size, making them practical choices for northern climates where you need both eggs and occasional meat. Research from University of Minnesota Extension shows that dual-purpose breeds maintain better body condition during winter months, continuing to lay when production breeds often stop. You’ll spend about 20% more on feed compared to pure layers since these birds need additional calories to maintain their larger frames. Processing weights typically range from 5-7 pounds for hens and 7-10 pounds for roosters at 16-20 weeks, giving you respectable meat yields without specialized growing techniques.
Common Mistake: Choosing only high-production layers without considering flock replacement costs. When your layers stop producing after 2 years, you’ll need to purchase or hatch new chicks. Dual-purpose breeds spread this cost over aSelecting the Right Chickens
Best Breeds for Beginners
You’ll want to start with docile, hardy breeds that forgive rookie mistakes and thrive in various climates. Rhode Island Reds, Buff Orpingtons, and Australorps top the beginner-friendly list because they handle temperature fluctuations well and rarely go broody. Plymouth Rocks and Sussex chickens also make excellent starter birds, producing 200-280 eggs annually while tolerating children and other pets. These breeds cost between $3-$8 per chick from most hatcheries and adapt quickly to backyard environments without specialized care requirements.
Pro Tip: Order from NPIP-certified hatcheries to ensure your birds are tested for pullorum and typhoid diseases. Murray McMurray Hatchery and Meyer Hatchery both maintain excellent health standards and ship nationwide.Egg Production Breeds (Layers)
White Leghorns dominate commercial egg production for good reason—they lay 280-320 white eggs per year while consuming less feed than heavier breeds. You’ll get your first eggs around 16-18 weeks with these efficient machines. Golden Comets and ISA Browns produce similarly impressive numbers of brown eggs, reaching 300+ annually during peak laying years. These hybrid layers excel in confined spaces but tend to burn out faster than heritage breeds.
Your feed conversion ratio matters significantly with high-production layers. Leghorns typically convert 1.8-2.0 pounds of feed into a dozen eggs, making them economical choices for serious egg producers. Plan to replace commercial layers after 2-3 years when production drops below 60%, though backyard keepers often keep them longer as pets. A University of California study found that peak production occurs between months 6-18, with gradual decline afterward. You’ll notice these breeds are flightier and less interested in human interaction compared to dual-purpose varieties, so factor in your desire for friendly birds versus maximum output. Consider supplemental lighting during winter months to maintain production—adding 2-4 hours of artificial light keeps layers producing when daylight drops below 14 hours daily.
Common Mistake: Buying only high-production layers without considering their shorter productive lifespan. Mix in some heritage breeds for long-term flock sustainability and better broodiness if you want to hatch chicks naturally.Dual-Purpose Breeds (Eggs + Meat)
Dual-purpose breeds give you flexibility to harvest meat birds while maintaining steady egg production at 200-250 eggs annually. Plymouth Rocks, Wyandottes, and Orpingtons reach 6-8 pounds at maturity, providing substantial meat yield when processed at 16-20 weeks. You’ll appreciate their calm temperaments and cold-hardiness, especially if you live in northern climates where combs don’t freeze easily. These heritage breeds also go broody reliably, letting you hatch replacement chicks without an incubator.
Your processing timeline differs significantly from Cornish Cross meat birds that reach harvest weight in just 8 weeks. Dual-purpose roosters need 16-20 weeks to reach 5-7 pounds, while pullets continue laying throughout their productive years. Sussex and Brahma chickens excel in free-range environments, converting foraged insects and vegetation into quality meat with better flavor profiles than confined birds. A Penn State Extension study showed that heritage breed meat contains 20-30% less fat than commercial broilers while offering richer taste. You’ll invest more in feed costs over the longer growing period—expect to spend $15-$25 per bird versus $8-$12 for fast-growing Cornish Cross. Many homesteaders
Housing Essentials
Coop Requirements and Design
Your chickens need 4 square feet of interior coop space per bird as a minimum, though 6-8 square feet prevents overcrowding issues during winter months when they’re confined indoors. The coop should face south or southeast to maximize natural light and warmth, with windows making up at least 10% of wall space for proper ventilation. Height matters too—you’ll want at least 3-4 feet of headroom for cleaning comfort, and your birds appreciate higher roosting spots since they instinctively seek elevation at night. A well-designed coop pays for itself by reducing health problems and making daily maintenance tasks take minutes instead of hours.
Essential Coop Features
Every functional coop needs proper roosting bars positioned 2-4 feet off the ground, spaced 12 inches apart to prevent territorial squabbles. Nesting boxes should provide one box per 3-4 hens, measuring 12x12x12 inches and filled with soft bedding material. Your ventilation system requires at least 1 square foot of ventilation per 10 square feet of floor space, positioned above bird level to prevent drafts while removing moisture and ammonia. The door should be wide enough for you to enter comfortably with cleaning tools, and an automatic door opener saves you from predawn wake-up calls.
Flooring choice dramatically impacts your maintenance routine and flock health. Concrete floors clean easily and block burrowing predators, but they’re cold and expensive—many backyard keepers prefer treated plywood covered with linoleum for easy scraping. Dirt floors cost nothing but harbor parasites and require frequent bedding changes using the deep litter method. Your nesting boxes work best when positioned lower than roosting bars (chickens won’t sleep where they lay), and adding a lip prevents eggs from rolling out. Studies from the University of California Cooperative Extension show that coops with proper ventilation reduce respiratory infections by 60% compared to poorly ventilated structures. Install hardware cloth over ventilation openings rather than chicken wire—the stronger mesh prevents raccoons from reaching through to grab sleeping birds.
Pro Tip: Paint your coop interior white or light colors to reflect natural light and make it easier to spot mites, droppings, and health issues during inspections. The extra visibility helps you catch problems before they become expensive veterinary visits.Predator-Proof Your Coop (Security Systems)
Hardware cloth with ½-inch openings is your first line of defense—chicken wire keeps chickens in but doesn’t keep predators out. Bury your fencing at least 12 inches deep or create an apron extending 2 feet outward to stop digging predators like foxes and dogs. Your coop door needs secure latches that require two-step operations since raccoons can open simple hooks and slide bolts. Motion-activated lights and alarms deter nighttime raiders, while automatic doors that close at dusk protect forgetful keepers from costly mistakes.
Predator pressure varies by region, but raccoons cause 40% of backyard chicken losses according to USDA surveys, followed by dogs, hawks, and foxes. Your run needs overhead protection too—hawks strike during daylight hours when chickens seem safest, so cover the top with netting or more hardware cloth. Electric fencing adds an extra layer of security for about $150, delivering a memorable shock that trains predators to avoid your property entirely. Check your coop perimeter weekly for signs of digging or attempted entry—predators test defenses repeatedly until they find weaknesses. A Michigan State University Extension study found that coops with buried barriers and secure latches experienced 85% fewer predator attacks than
Specialty and Heritage Breeds
Bantam Chickens for Small Spaces
You’ll find bantams are perfect miniature chickens, typically weighing just 1-2 pounds compared to standard breeds at 5-8 pounds. These pint-sized birds require only 2 square feet of coop space per bird versus the standard 4 square feet, making them ideal for urban backyards and small homesteads. Popular bantam breeds like Silkies, Sebrights, and Belgian d’Uccles produce smaller eggs (you’ll need about 5-6 bantam eggs to equal 4 standard eggs), but they’re incredibly friendly and often go broody, making them excellent mothers. Your feed costs will drop significantly since bantams consume approximately 60% less feed than full-sized chickens.
Show Quality and Ornamental Breeds
Show-quality chickens meet strict American Poultry Association (APA) standards for their breed, including specific feather patterns, comb types, body shapes, and color requirements. Polish chickens with their elaborate crests, Frizzles with curled feathers, and Modern Game birds with their upright stance are popular ornamental choices that command attention at poultry shows. You can expect to pay $50-$200 for quality show birds versus $3-$5 for standard hatchery chicks.
Breeding show-quality birds requires meticulous record-keeping and selective pairing to maintain breed standards set forth in the APA’s Standard of Perfection. Your birds will be judged on a 100-point scale, with deductions for defects like crooked toes, off-color feathers, or improper comb structure. The National Poultry Improvement Plan (NPIP) certification becomes important if you plan to sell or transport birds across state lines for shows. Many exhibitors spend years perfecting their lines, with champion birds at the Ohio National Show or Louisville’s Kentucky State Fair selling for thousands of dollars. Pro Tip: Join your local poultry club before investing heavily in show birds—experienced breeders can help you understand breed standards and avoid costly mistakes when selecting foundation stock.
Heritage Breed Conservation
Heritage breeds are traditional chicken varieties that existed before industrial agriculture, defined by The Livestock Conservancy as breeds established before 1950 that reproduce naturally and live productive outdoor lives. Critically endangered breeds like Chanteclers (fewer than 500 breeding birds in North America) and Crevecoeurs need your help to survive, as industrial farming has reduced chicken genetic diversity by over 75% since the 1950s. You’re preserving genetic traits like natural foraging ability, disease resistance, and climate adaptability when you raise heritage breeds.
The Livestock Conservancy maintains a Conservation Priority List that categorizes breeds from “Critical” (fewer than 500 breeding birds) to “Recovering” (more than 10,000 birds). Your choice to raise breeds like Buckeyes, Dominiques, or Delaware chickens directly supports biodiversity and food security—these birds carry genetic traits that may become crucial as climate patterns shift and disease pressures evolve. Many heritage breeds thrive on pasture with minimal intervention, making them more sustainable and cost-effective for small-scale farmers than commercial hybrids that require carefully controlled environments. Organizations like the American Livestock Breeds Conservancy offer breeder directories and conservation breeding guidelines to help you maintain genetic diversity within your flock. Common Mistake: Don’t assume all old breeds are heritage breeds—true heritage chickens must meet specific criteria for natural mating, longevity, and slow growth rates, which many “heirloom” hatchery strains no longer possess due to selective breeding for production traits.
 1")
Daily Care and Maintenance
Feeding Your Flock
Your chickens need consistent access to quality layer feed containing 16-18% protein for optimal egg production and health. A standard hen consumes approximately 1/4 to 1/3 pound of feed daily, which translates to roughly one 50-pound bag feeding six chickens for about a month. Store feed in metal containers to prevent rodent infestations, and you’ll want to check feeders twice daily to ensure they’re full and dry. Moldy or wet feed can cause serious respiratory issues and crop impaction, so discard any compromised feed immediately. The University of Georgia Extension recommends providing 1 linear inch of feeder space per bird to reduce competition and pecking order disputes.
Water Management
Fresh, clean water ranks as your flock’s most critical daily requirement, with each chicken drinking between 1-2 cups of water per day depending on temperature and egg production. During summer months, this consumption can double or even triple when temperatures exceed 85°F. You’ll need to check waterers at least twice daily, scrubbing them weekly with a diluted vinegar solution to prevent algae buildup and bacterial growth. Chickens won’t drink dirty water and can become dehydrated within hours on hot days.
Position your waterers on elevated platforms or use hanging styles to minimize contamination from bedding, droppings, and scratching behaviors. In winter climates, frozen water poses a life-threatening challenge that requires heated bases or frequent water changes throughout the day. Michigan State University Extension found that flocks with consistent water access produced 25% more eggs than those with intermittent access. Consider installing nipple waterers for cleaner water delivery, though you’ll need to train your birds to use them by tapping the nipples to demonstrate water flow. Pro Tip: Add a tablespoon of apple cider vinegar per gallon of water weekly to support digestive health and reduce algae growth naturally.
Supplements and Treats
Your laying hens require supplemental calcium in the form of crushed oyster shells or eggshells offered free-choice in a separate container. Treats should comprise no more than 10% of your flock’s daily diet to maintain proper nutrition balance and prevent obesity. Popular healthy options include mealworms (excellent protein source), leafy greens, berries, and vegetable scraps, while you must avoid avocado, chocolate, dried beans, and anything moldy or salty. Scratch grains make poor daily feeds since they’re imperatively chicken candy—high in carbs but nutritionally incomplete.
Grit (small stones or granite chips) becomes imperative if you’re feeding anything beyond commercial pellets, as chickens lack teeth and need these materials in their gizzards to grind food properly. Layer hens producing eggs need approximately 4 grams of calcium daily, which their regular feed alone cannot provide adequately. The University of California Cooperative Extension reports that calcium deficiency leads to thin shells, decreased production, and potentially fatal egg binding. During molting season (typically fall), you can temporarily increase protein to 20% by offering game bird feed or additional protein-rich treats like scrambled eggs or black soldier fly larvae. Common Mistake: New chicken keepers often overfeed treats, leading to nutritional imbalances, reduced egg production, and aggressive begging behaviors that disrupt normal flock dynamics.
Where and How to Buy Chickens
Hatcheries vs. Local Breeders vs. Feed Stores
You’ll find three main sources for purchasing chickens, each with distinct advantages. Mail-order hatcheries like Murray McMurray and Meyer Hatchery ship day-old chicks nationwide, offering the widest breed selection and NPIP certification (National Poultry Improvement Plan), though minimum orders typically start at 4-6 birds. Local breeders provide hands-on selection and the chance to see parent stock, plus you’re supporting small-scale farming in your community. Feed stores like Tractor Supply and local co-ops stock chicks seasonally from February through June, letting you buy as few as one bird while avoiding shipping stress—though breed choices remain limited and sexing accuracy can drop to 80-90%.
Chicks vs. Pullets vs. Laying Hens
Day-old chicks cost $3-8 each but require 5-6 months and brooding equipment before producing eggs, making them the most economical long-term choice. Pullets (young hens around 16-20 weeks old) run $20-35 each and start laying within weeks, eliminating the brooding phase entirely. Point-of-lay or already-laying hens command $35-60+ but deliver immediate egg production—you’re imperatively paying someone else for the feed and care during those non-productive months.
Your decision hinges on patience, budget, and experience level. Starting with chicks means you’ll handle the delicate brooding process with heat lamps, temperature monitoring every few hours, and higher mortality risk—expect 5-10% losses even with proper care. The payoff comes in bonding; chicks raised from day one become noticeably friendlier and more handleable as adults. Pullets offer a middle ground that many first-timers prefer, giving you birds hardy enough to skip the brooder but young enough to adapt to your setup. Already-laying hens can be tricky—they’ve established pecking orders elsewhere and may stress when relocated, sometimes stopping egg production for 2-4 weeks during adjustment. Production breeds like ISA Browns or Golden Comets hit peak laying at 20-24 weeks, while heritage breeds like Brahmas won’t mature until 6-7 months, so factor in breed characteristics when comparing ages.
Vetting Sources: Health Checks and Biosecurity
Always verify your source participates in NPIP testing, which screens breeding flocks for Salmonella Pullorum, Salmonella Typhoid, and Avian Influenza. You can search the USDA NPIP directory online to confirm a hatchery’s or breeder’s certification status. When buying in person, reject any bird showing nasal discharge, labored breathing, pasty vent (dried feces around the rear), or lethargy—these signal potential disease. Check that facilities look clean with fresh water, adequate space, and separation between age groups, since mixing different-aged birds dramatically increases disease transmission risk.
Biosecurity becomes your responsibility the moment birds arrive at your property. Quarantine new chickens for 30 days minimum, keeping them at least 30 feet from your existing flock if you already have birds—many backyard keepers learn this lesson the hard way after introducing Mycoplasma or Marek’s disease to healthy flocks. Change clothes and shoes between handling quarantined and established birds, and always work with your existing flock first before tending to newcomers. A 2023 University of California-Davis study found that 73% of backyard disease outbreaks traced back to recently purchased birds that weren’t properly quarantined. Ask sellers about vaccination history, particularly for Marek’s disease, which hatcheries typically administer at day one but smaller operations may skip. Request health records if available, and don’t hesitate to walk away from sources that seem evasive about their testing protocols or f
Health and Wellness
Preventive Healthcare
Your best defense against chicken diseases starts with daily observation and consistent biosecurity practices. Clean waterers every 48 hours to prevent bacterial buildup, and refresh bedding weekly in coops with proper ventilation. Quarantine new birds for 30 days before introducing them to your existing flock—this simple step prevents 80% of disease transmission according to University Extension research. Dust baths with food-grade diatomaceous earth naturally control external parasites, while adding apple cider vinegar (1 tablespoon per gallon) twice weekly supports digestive health.
Pro Tip: Create a weekly health checklist that includes checking eyes, combs, vents, and droppings. Early detection means easier treatment—spotting watery droppings on Monday versus Friday can make the difference between a simple fix and a flock-wide problem.Common Health Issues (Diagnosis & Treatment)
Respiratory infections top the list of backyard chicken ailments, with symptoms including wheezing, nasal discharge, and reduced egg production. Bumblefoot appears as black scabs on foot pads, often requiring antibiotic ointment and bandaging. Mites and lice cause feather loss around the vent area—you’ll spot tiny moving specks at night with a flashlight. Coccidiosis strikes young chicks with bloody droppings and requires immediate medicated water treatment. Egg binding affects hens straining without producing eggs for over 24 hours.
Sour crop feels like a water balloon in the chicken’s chest area and happens when food ferments instead of digesting properly. You’ll need to massage the crop gently and possibly withhold food for 12 hours while offering only water with probiotics. Wry neck causes head tilting or twisting, often responding well to vitamin E (400 IU daily) and selenium supplements within 3-5 days. Marek’s disease shows up as paralysis in one leg, but vaccinating day-old chicks prevents this devastating condition. Pasty butt in baby chicks needs immediate attention—soften the dried droppings with warm water and gently remove them to prevent fatal blockage. Track your treatments in a simple notebook with dates, symptoms, and outcomes to build your diagnostic skills over time.
Common Mistake: Using antibiotics without proper diagnosis wastes money and creates resistant bacteria. A $15 fecal test from your local extension office identifies the exact problem, saving you from treating the wrong condition.When to Call a Vet
Contact an avian veterinarian immediately if you observe labored breathing, complete loss of appetite for 24+ hours, or bloody droppings. Sudden paralysis, seizures, or a hen egg-bound for more than six hours requires emergency intervention. Injuries with exposed bone or deep wounds need professional suturing within hours. Any time more than 20% of your flock shows identical symptoms simultaneously, you’re facing a potentially contagious outbreak that demands expert diagnosis.
Finding an avian vet before emergencies strike saves precious time—many rural areas have limited poultry specialists, with the nearest one potentially 50+ miles away. Call ahead to verify they treat chickens, as some small animal practices only handle cats and dogs. Expect to pay $45-$75 for basic exams, with diagnostic tests adding $30-$150 depending on complexity. Building a relationship with a vet also gives you phone consultation access for borderline situations where you’re unsure if a trip is necessary. Some veterinarians offer flock health plans for $150-$300 annually, including preventive visits and discounted emergency care. Join your local BackYard Chickens community to get recommendations for poultry-savvy vets in your area, and keep their emergency number posted in your coop alongside your regular vet’s contact information.
 2")
Housing Your Flock
Coop Requirements and Design
Your coop needs to provide at least 3-4 square feet per bird inside and 8-10 square feet per bird in the outdoor run. Overcrowding leads to stress, pecking, and disease outbreaks that can devastate your flock within days. Plan for ventilation openings near the roof to allow moisture and ammonia to escape while preventing drafts at roost level. A well-designed coop should face south or southeast to maximize natural light during winter months when egg production naturally declines. The ultimate guide to backyard chicken care: Raising healthy birds offers detailed blueprints for various coop sizes and climates.
Essential Coop Features
Your chickens will spend up to 16 hours daily inside the coop, so proper roosting bars are non-negotiable. Install bars 2-4 feet off the ground, using 2×4 lumber placed with the wide side up so birds can cover their feet completely during cold nights. Nesting boxes should measure 12×12 inches, with one box for every 3-4 hens to prevent territorial disputes. Position boxes lower than roosts to discourage birds from sleeping in them, which creates unsanitary conditions and dirty eggs.
Your flooring choice dramatically impacts daily maintenance and flock health. Concrete floors are easiest to clean and prevent rodent tunneling, but they’re cold and require thick bedding layers. Dirt floors with hardware cloth buried 12 inches deep offer natural drainage and allow chickens to dust bathe, though they need more frequent bedding replacement. Many successful backyard keepers use the deep litter method, adding fresh pine shavings weekly and doing a complete cleanout only 2-3 times yearly. This composting system generates heat in winter and beneficial microbes that actually reduce ammonia levels. Never use cedar shavings, as the aromatic oils can damage chicken respiratory systems and cause chronic health issues.
Predator-Proof Your Coop
Raccoons can open simple latches, unlatch hook-and-eye closures, and even turn doorknobs, making them your most formidable threat. You’ll need to install carabiner clips or padlocks on all doors, not just simple hooks. Hardware cloth with 1/2-inch openings is the only acceptable material for windows and ventilation—chicken wire keeps chickens in but doesn’t keep predators out. Predators kill an estimated hundreds of thousands of backyard chickens annually, with most attacks happening at night when birds are vulnerable on their roosts.
Your run needs hardware cloth extending at least 12 inches underground or an apron extending 24 inches outward from the base to prevent digging predators. Weasels can squeeze through openings as small as one inch, so inspect your coop monthly for any gaps in siding or around doors. Cover the top of your run with netting or hardware cloth, as hawks account for up to 30% of daytime predation in suburban areas. Motion-activated lights deter nocturnal predators like foxes and coyotes, though determined predators will adapt to regular patterns. One Oregon chicken keeper lost 12 birds in a single night to a mink that entered through a 2-inch gap where the wall met the foundation—a $15 repair would have prevented a $300 loss. Electric poultry netting provides excellent protection for free-ranging flocks and can be moved easily to fresh pasture areas.
Pro Tip:Egg Production Management
Understanding Egg Laying
Your hens reach point-of-lay at 16-24 weeks depending on breed, with most commercial layers starting around 18 weeks. Chickens need 14-16 hours of daylight to maintain consistent production, which naturally decreases during winter months. Each hen produces approximately 250-300 eggs in her first year, with production declining 10-20% annually after that. The laying cycle follows a 25-26 hour pattern, meaning eggs come slightly later each day until the hen skips a day to reset.
Maximizing Egg Production (Advanced Techniques)
Strategic management can push your flock’s output beyond baseline expectations. Supplemental lighting programs maintain winter production by extending daylight hours artificially, while precise protein adjustments throughout the year optimize shell quality and laying frequency. Advanced keepers track individual hen performance using leg bands and production records to identify top producers for breeding programs.
Production FactorOptimal Range/PracticeDaily Light Hours14-16 hours (add 15 minutes weekly in fall)Protein Content16-18% layer feed (increase to 20% during molt)Calcium AvailabilityFree-choice oyster shell + 3.5-4% in feedWater Temperature50-55°F optimal (prevents reduced consumption)Nest Box Ratio1 box per 4-5 hens minimum Pro Tip: Install timers on your coop lighting to gradually increase illumination in the morning rather than evening. This prevents hens from being caught off-roost when lights suddenly shut off at night, reducing stress and maintaining the natural roosting behavior that keeps your flock healthy.
- Monitor individual hen production by checking vent condition—moist, pale vents indicate active layers while dry, yellow vents suggest non-layers
- Implement a strategic molting program for commercial flocks by reducing light to 8 hours for 7-10 days, allowing synchronized feather renewal
- Add omega-3 supplements like flaxseed (10% of diet) to produce premium eggs that command higher prices at farmers markets
- Use trap nests temporarily to identify your best layers—University of Georgia studies show top 20% of hens produce 40% more eggs than average
- Maintain coop temperatures between 45-80°F; production drops 10-15% when temperatures exceed 85°F consistently
Common Mistake: Many beginners add excessive lighting too quickly, jumping from 10 to 16 hours overnight. This sudden change stresses your flock and can trigger premature molting. According to Penn State Extension research, gradual increases of 30 minutes per week prevent reproductive system shock and maintain steady production curves throughout seasonal transitions.
Your feed management directly impacts both quantity and quality of eggs produced. Switching to a higher-energy feed (2,850-2,900 kcal/kg) during cold months compensates for calories burned maintaining body temperature, preventing production dips. Some advanced operations use phase feeding programs that adjust nutrient density based on flock age—young layers receive 18% protein while older hens (70+ weeks) benefit from 16% protein with increased calcium. Track your feed conversion ratio by weighing feed consumed against eggs produced; efficient flocks achieve 1.8-2.2 pounds of feed per dozen
 3")
Run Design and Free-Range Considerations
Enclosed Run Construction
Your enclosed run should provide at least 8-10 square feet per bird to prevent behavioral issues and maintain flock health. Hardware cloth with 1/2-inch mesh offers superior protection compared to chicken wire, which predators can easily tear through. Burying your fencing 12-18 inches deep with an L-footer extending outward stops digging predators like foxes and raccoons. A covered top prevents aerial attacks from hawks and climbing predators—many backyard chicken keepers in suburban areas report hawk attacks as their primary threat. Consider adding a concrete or gravel apron around the perimeter for additional digging deterrence.
Pro Tip: Install your run on a slight slope to improve drainage. Standing water creates muddy conditions that lead to bumblefoot infections and attracts mosquitoes.Chicken Tunnels (Chunnels) for Controlled Ranging
Chicken tunnels, affectionately called “chunnels,” give your flock safe access to fresh grass and insects without exposing them to predators. These covered pathways typically measure 2-3 feet wide and can extend 20-50 feet from your coop. You’ll construct them using PVC hoops covered with hardware cloth or welded wire, creating protected corridors your chickens can explore. This system works exceptionally well for urban and suburban settings where full free-ranging isn’t possible due to neighborhood restrictions or predator pressure.
The modular design of chunnels allows you to create elaborate systems connecting multiple grazing areas throughout your yard. Many chicken keepers build T-junctions and Y-connectors to maximize pasture rotation—your chickens can access different lawn sections while others recover. A well-designed chunnel system can provide grazing access to 200-300 square feet of yard space while keeping birds completely protected. You can move portable chunnel sections weekly to prevent overgrazing, and the covered design means your grass stays healthier than with traditional free-ranging. Studies from the University of California Cooperative Extension show that chickens with chunnel access consume 30-40% more fresh greens and insects compared to those confined to static runs, improving both egg quality and bird health.
Common Mistake: Building chunnels without adequate ventilation. Chickens won’t use tunnels that feel like hot, enclosed spaces. Leave 6-8 inches of open space at ground level or use larger mesh at the top for airflow.Garden Protection Strategies
Your chickens will devastate unprotected garden beds within hours—they scratch, dig, and consume everything from seedlings to ripe tomatoes. Permanent fencing around garden areas is non-negotiable if you want both chickens and vegetables. Four-foot tall welded wire fencing keeps most standard breeds out, though you’ll need 5-6 feet for lighter breeds that fly well. Raised beds with 12-inch walls provide additional protection, and you can add temporary netting over beds during critical growing periods when plants are most vulnerable.
Strategic integration of chickens and gardens actually benefits both when properly managed. Allowing supervised chicken access to garden beds during fall and early spring lets them clear pest larvae, till soil, and add valuable manure while plants aren’t actively growing. The Cornell Waste Management Institute found that chickens reduce Japanese beetle grubs by up to 80% when given controlled garden access during dormant seasons. You can create sacrifice zones—designated garden areas where chickens always have access—planted with chicken-friendly crops like comfrey, kale, and sunflowers. Some innovative gardeners use temporary electric poultry netting (like Premier1’s PoultryNet) to rotate chickens through finished garden sections, letting birds clean up crop residue and prepare beds for the next season. This rotation system reduces your fertilizer costs while providing pest control, creating a regenerative cycle between your f
Advanced Chicken Keeping
Moving beyond basic care requires understanding the intricate details of chicken biology, behavior, and genetics that separate casual backyard flocks from professionally managed operations.
Your journey into advanced chicken keeping opens doors to selective breeding programs, complex flock dynamics, and sophisticated management techniques that maximize both productivity and bird welfare.
Breeding and Genetics
Selective breeding transforms your flock from random egg producers into specialized birds with desired traits. You’ll need at least three generations to stabilize genetic characteristics, whether you’re breeding for egg color, size, temperament, or cold hardiness. Track parentage meticulously using leg bands, maintain breeding records with hatch dates and performance metrics, and cull ruthlessly to eliminate undesirable traits. Understanding Mendelian genetics helps predict outcomes—dominant genes like pea combs and rose combs will express in F1 generations, while recessive traits like blue eggs require homozygous pairings.
Flock Behavior and Management
Advanced flock management requires reading subtle behavioral cues that indicate hierarchy shifts, stress levels, and social disruptions. Your pecking order establishes within 48 hours of introducing new birds, and disruptions can decrease egg production by 15-20% for up to two weeks. Watch for displacement behaviors like excessive preening, feather pecking, or isolated birds refusing to roost—these signal management intervention is needed before problems escalate.
Flock size directly impacts behavior complexity, with groups over 30 birds forming sub-hierarchies and multiple pecking orders. You’ll notice alpha hens controlling prime nesting boxes and feeding stations, while subordinate birds wait their turn or establish satellite feeding areas. Providing multiple resource stations—at least one feeder per 10 birds and one nesting box per 4 hens—reduces competition-based aggression. Seasonal behavioral changes affect flock dynamics too; molting hens drop in pecking order temporarily, creating instability that requires monitoring. For comprehensive guidance on flock management, check out Raising Chickens 101 – Chicks, Breeds, Coops, Tips for community-tested strategies.
Seasonal Management Strategies
Each season demands specific management adjustments to maintain optimal flock health and production. Winter management focuses on moisture control rather than just temperature—ventilation becomes critical as condensation from respiration creates frostbite conditions and respiratory issues. Spring brings increased predator pressure during nesting season, requiring enhanced security measures. Summer heat stress reduces feed intake by 25-30% when temperatures exceed 85°F, necessitating feeding schedule adjustments and electrolyte supplementation.
Your seasonal planning should include photoperiod manipulation for year-round laying, with artificial lighting maintaining 14-16 hours of light daily during shorter days. Fall preparation involves deep litter method implementation, where carbon-rich bedding composts in place, generating heat through microbial activity—this biological heating can raise coop temperatures by 10-15°F naturally. Seasonal feed adjustments matter significantly; increase protein to 18-20% during molt, boost calcium during peak laying season, and add scratch grains in winter for metabolic heat generation. Track seasonal production patterns using spreadsheets or apps, noting drops that correlate with weather changes, daylight hours, or management shifts to refine your approach annually.
SeasonKey Management FocusWinterVentilation without drafts, moisture control, supplemental lighting, high-energy feedsSpringPredator protection during nesting, pasture rotation setup, chick integration planningSummerHeat stress prevention, shade provision, water consumption monitoring, evening feedingProduction FactorOptimization MethodLighting ScheduleMaintain 16 hours light/8 hours dark using timers; increase gradually by 15 minutes weeklyProtein LevelsAdjust to 18-20% during peak production; switch to 16% maintenance feed after 72 weeksCalcium SupplementationOffer oyster shell free-choice; hens self-regulate intake based on shell formation needsTemperature ControlKeep coop between 45-75°F; production drops 5% for every 10°F above 75°FStress MinimizationAvoid flock disruptions, predator pressure, and sudden feed changes during laying cyclesBreeding GoalTimeline to ResultsIncreased egg production2-3 generations (4-6 years)Temperament improvement3-4 generations (6-8 years)Cold hardiness2-3 generations (4-6 years)Specific color patterns4-6 generations (8-12 years)Disease resistance5-7 generations (10-14 years)